How to create a product in your WordPress WooCommerce Website from scratch.
This guide will walk you through creating a product on your WordPress WooCommerce website from start to finish
1. Introduction
Follow the precise and engaging instructions to set up a new product with ease.

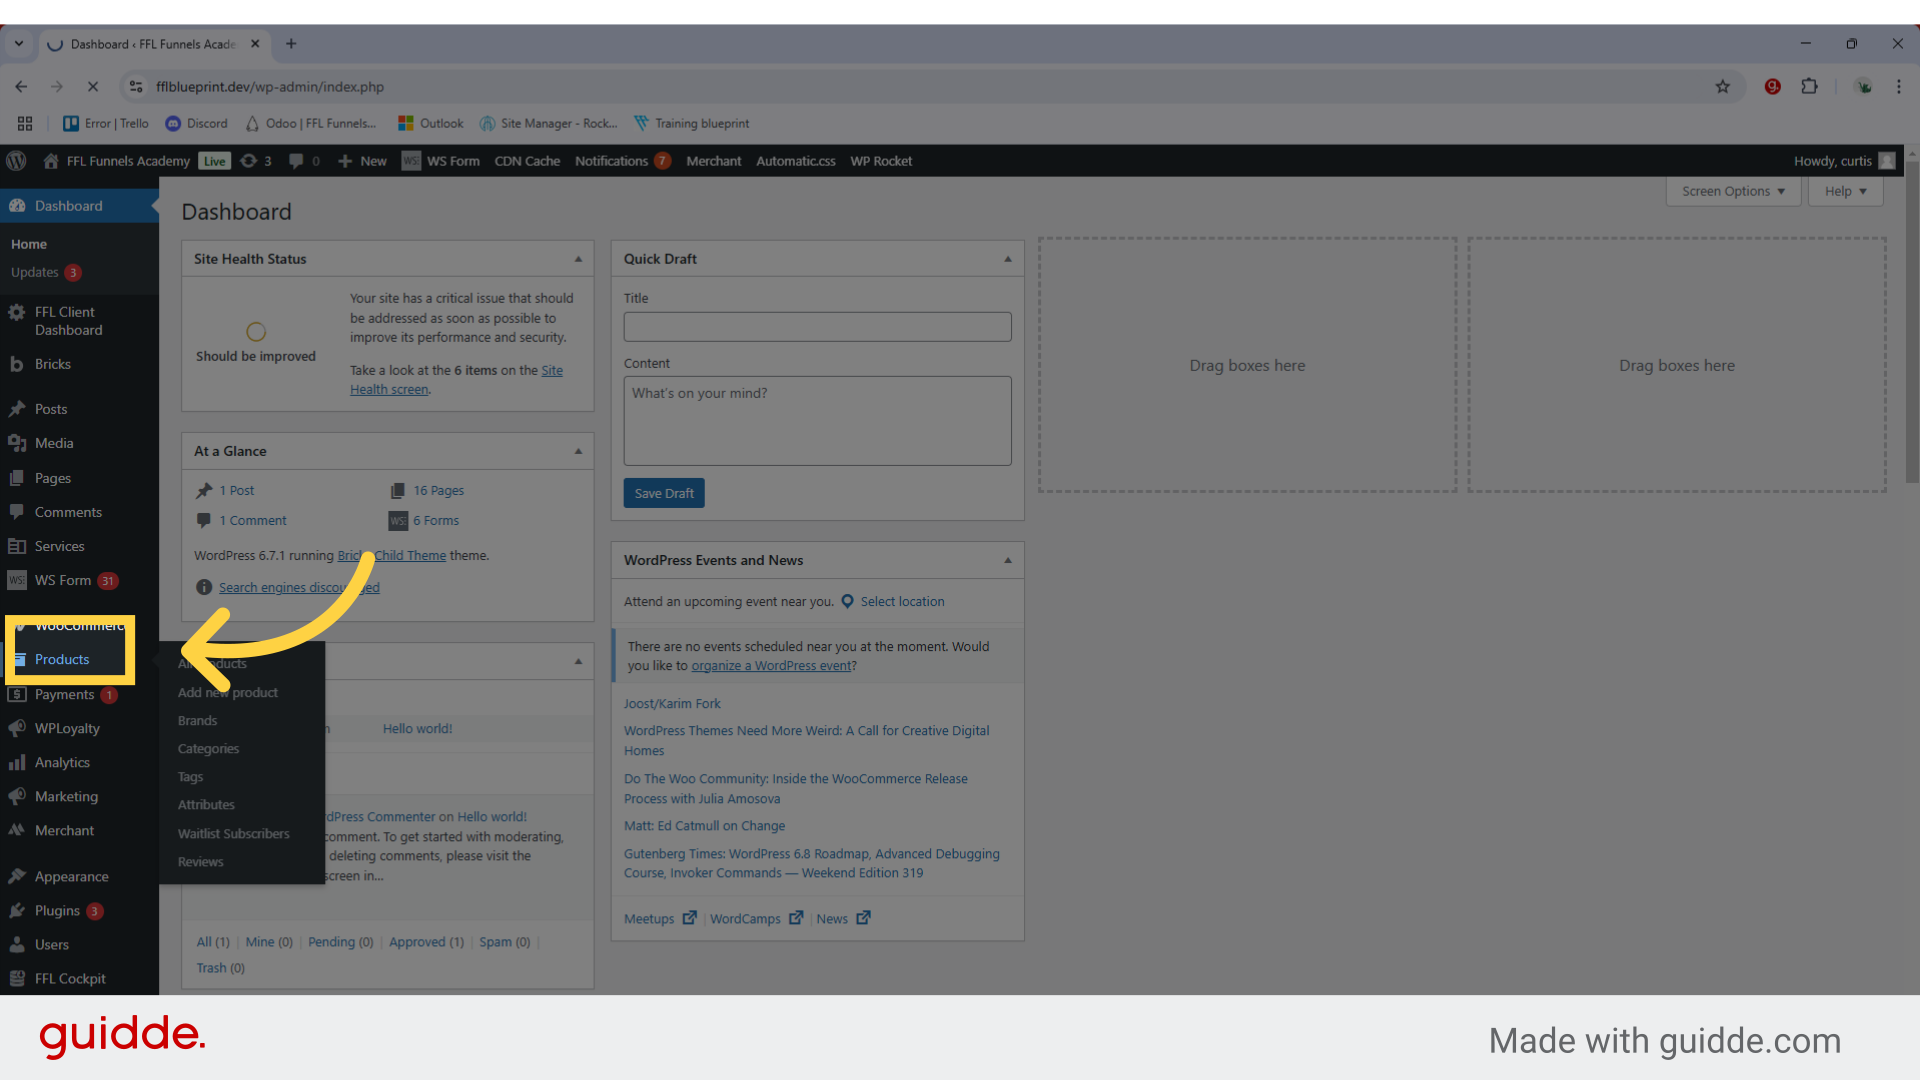
2. Navigate to Products
Navigate to the Products section on the lefthand bar.
3. Select 'Add New Product'
Click 'Add new product'

4. Enter the Product name
Enter the name of the product.

5. Add your product description
The Main Product Description is Located below the product images and purchase options. It provides comprehensive product details. Supports rich formatting including: Text formatting (bold, italic, headings) Images and galleries. Tables. Bullet points and numbered lists. Custom HTML. Embedded videos. Shortcodes. Best practices for product descriptions include: Using clear, scannable formatting. Including relevant keywords for SEO. Providing specific product details (dimensions, materials, etc.). Addressing common customer questions. Highlighting unique selling points. Using high-quality images to complement the text.

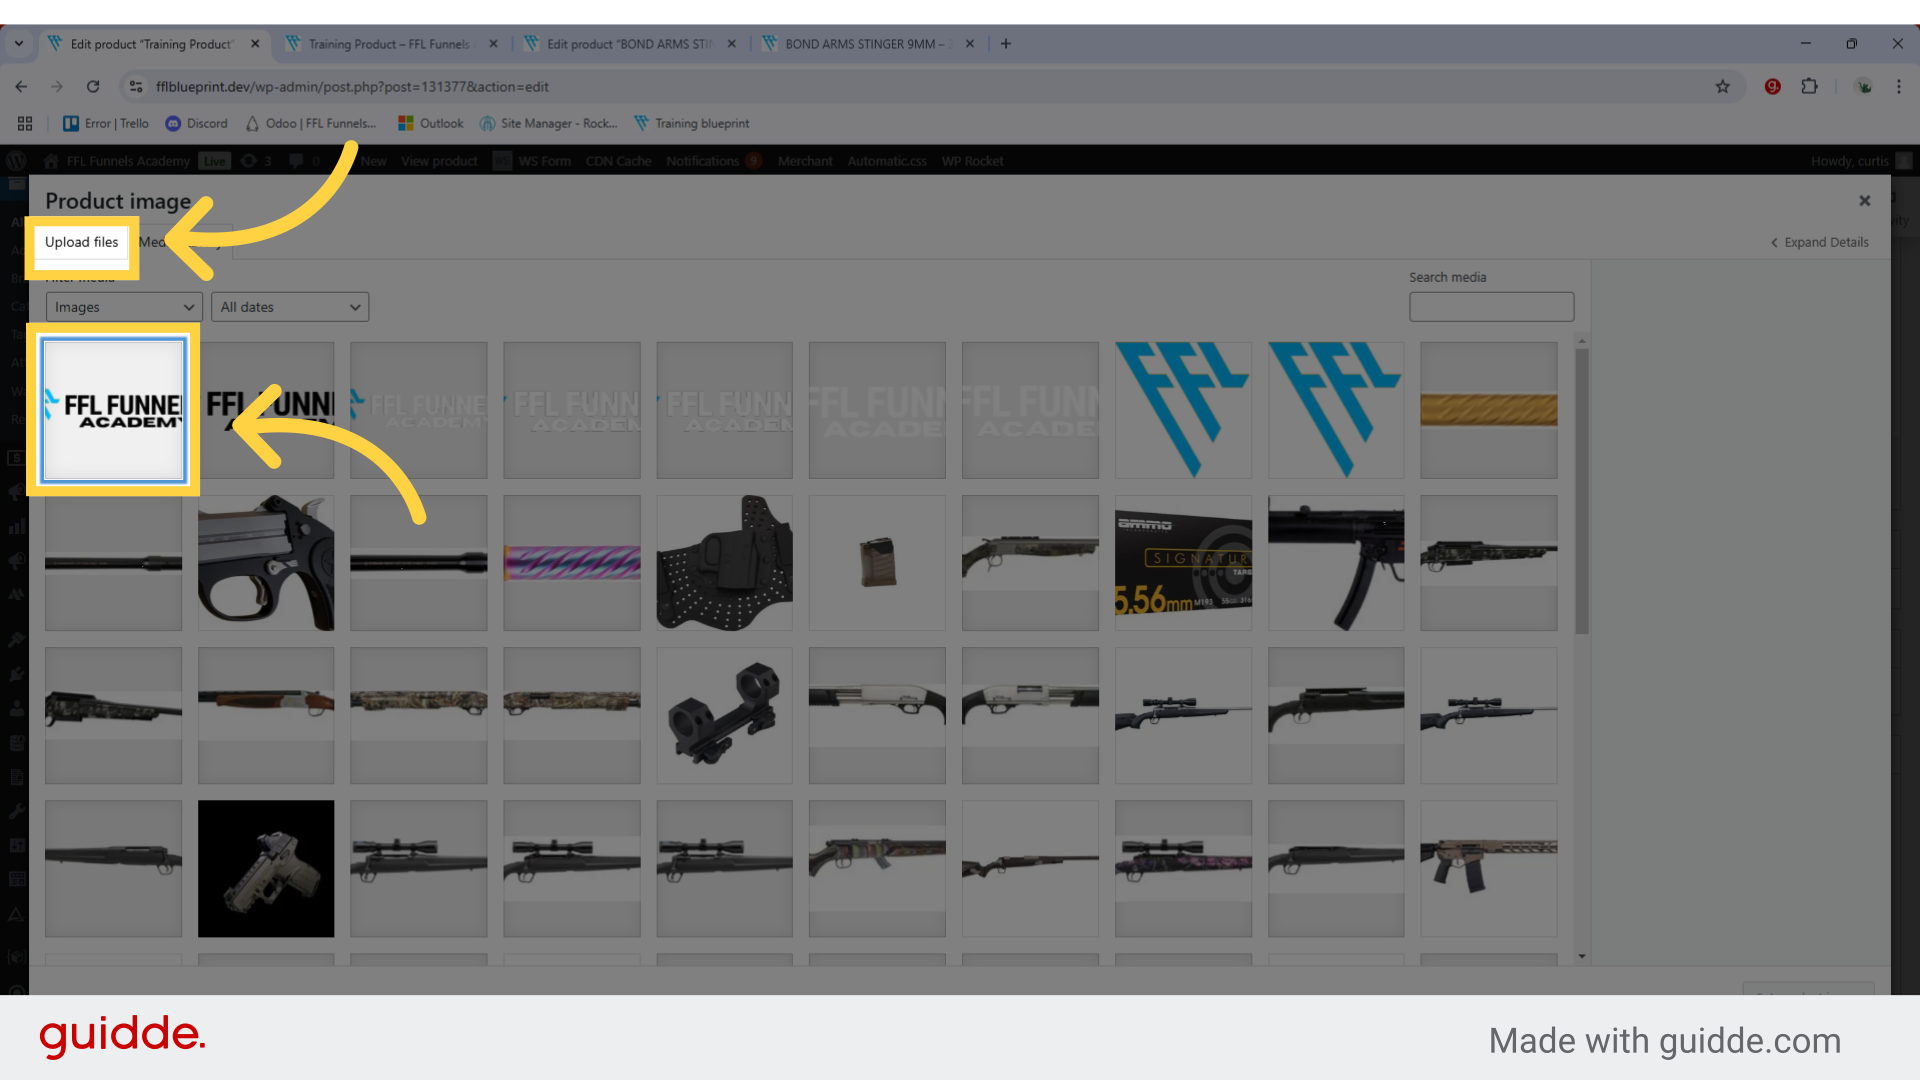
6. Add Product Image
To add a primary product image: Navigate to the 'Product Image' panel in the right sidebar of your product page Click 'Set Product Image'

7. Select your primary product image from the media library
Choose one of these options: Upload a new image from your computer Select an existing image from your Media Library
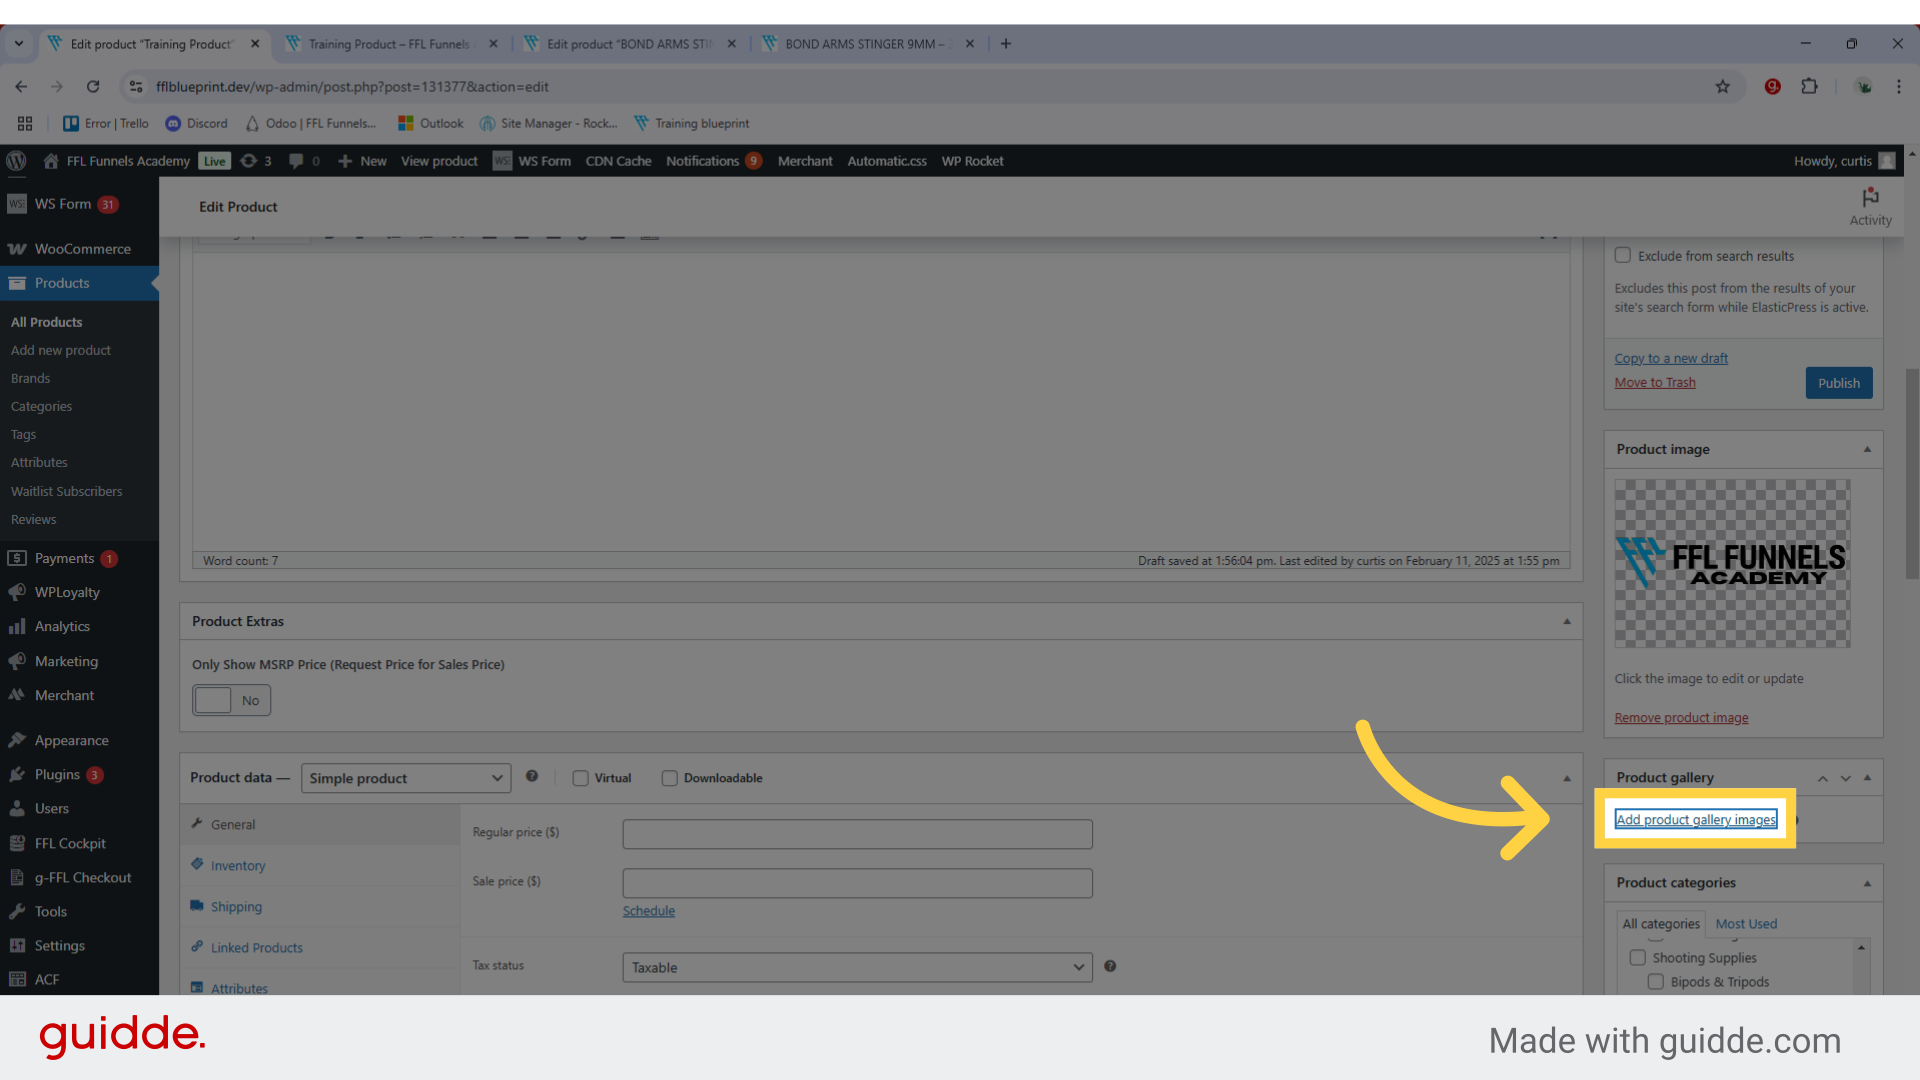
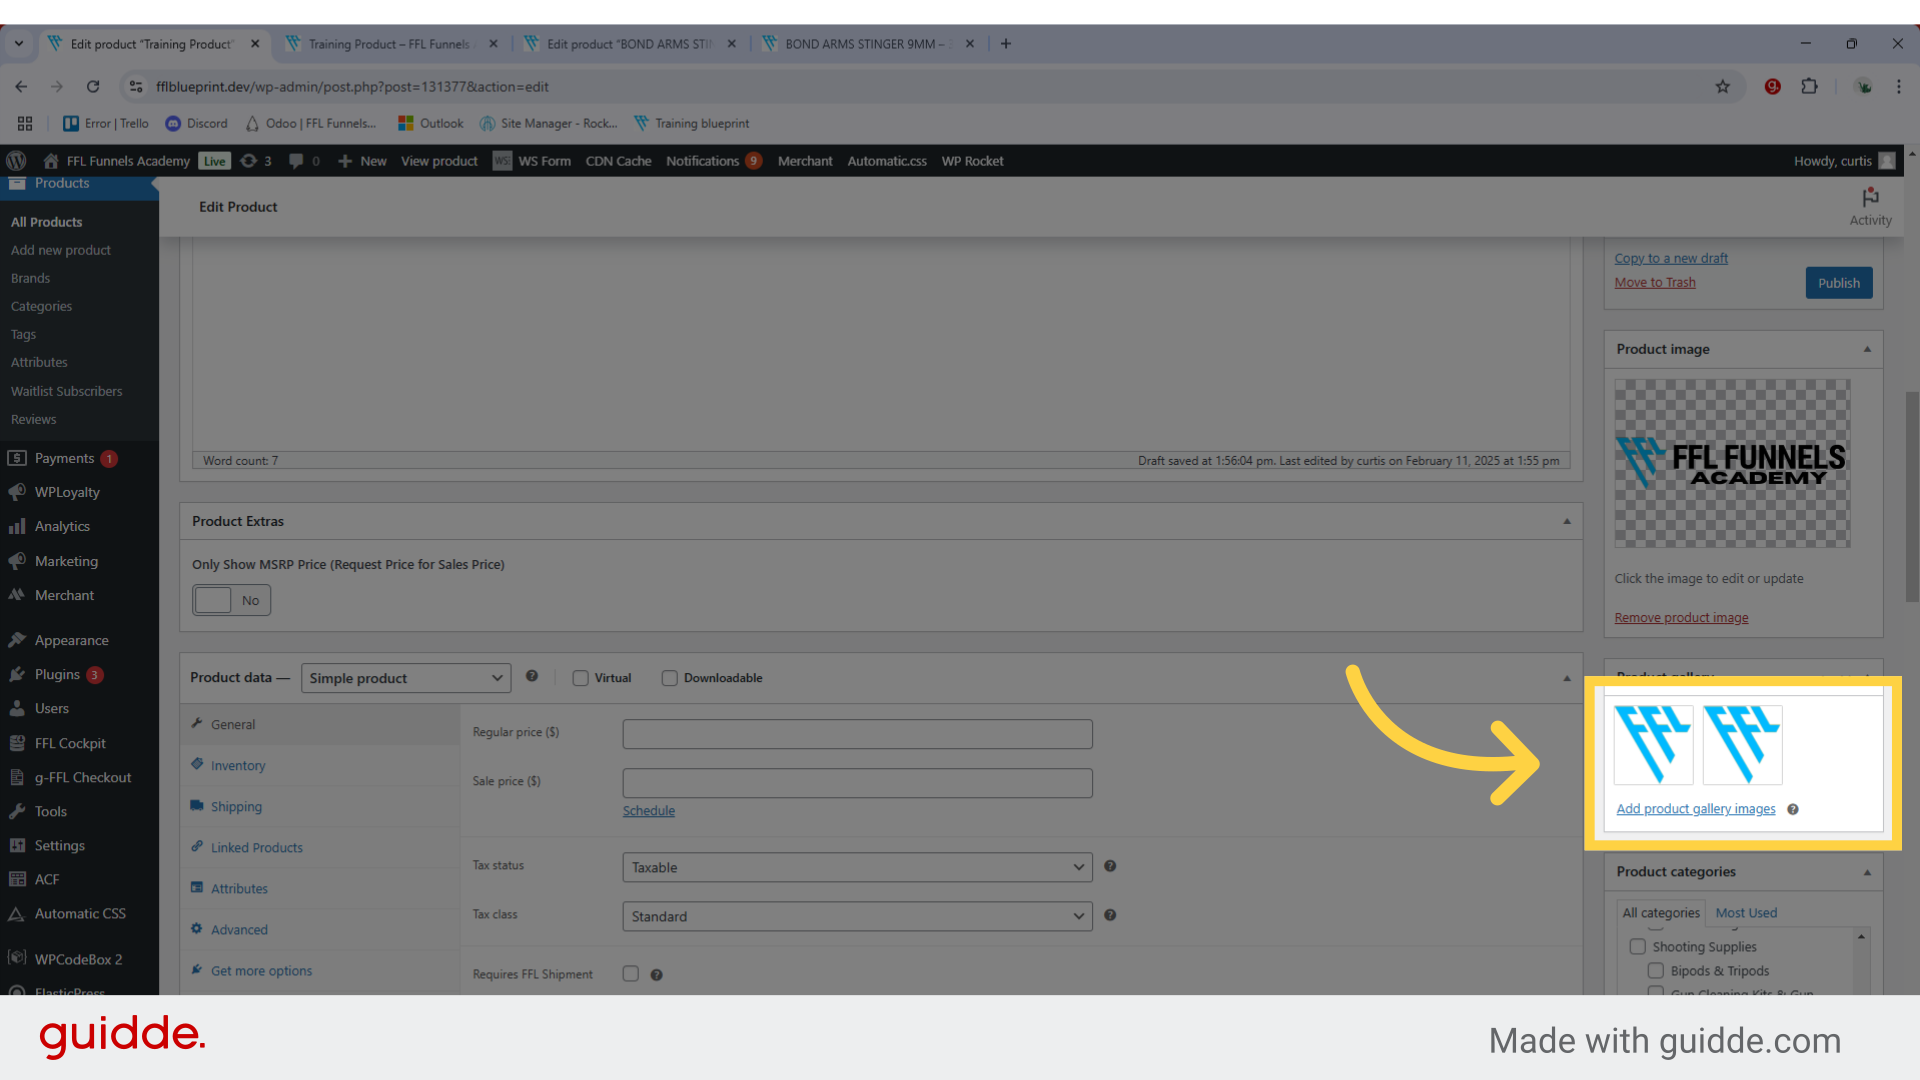
8. Gallery Product Images
A product gallery image in WordPress (specifically in WooCommerce) is part of the collection of additional product photos that appear alongside the main product image. Here's what you need to know Key Differences from Main Product Image: Main product image: Single primary photo that represents the product (appears in search, catalog, cart). Gallery images: Secondary images that provide additional visual information. Here's how to set up a product gallery in WordPress: Find the 'Product Gallery' section, Look in the right sidebar below the 'Product Image' panel It's labeled as "Product gallery" Click 'Add product gallery images'
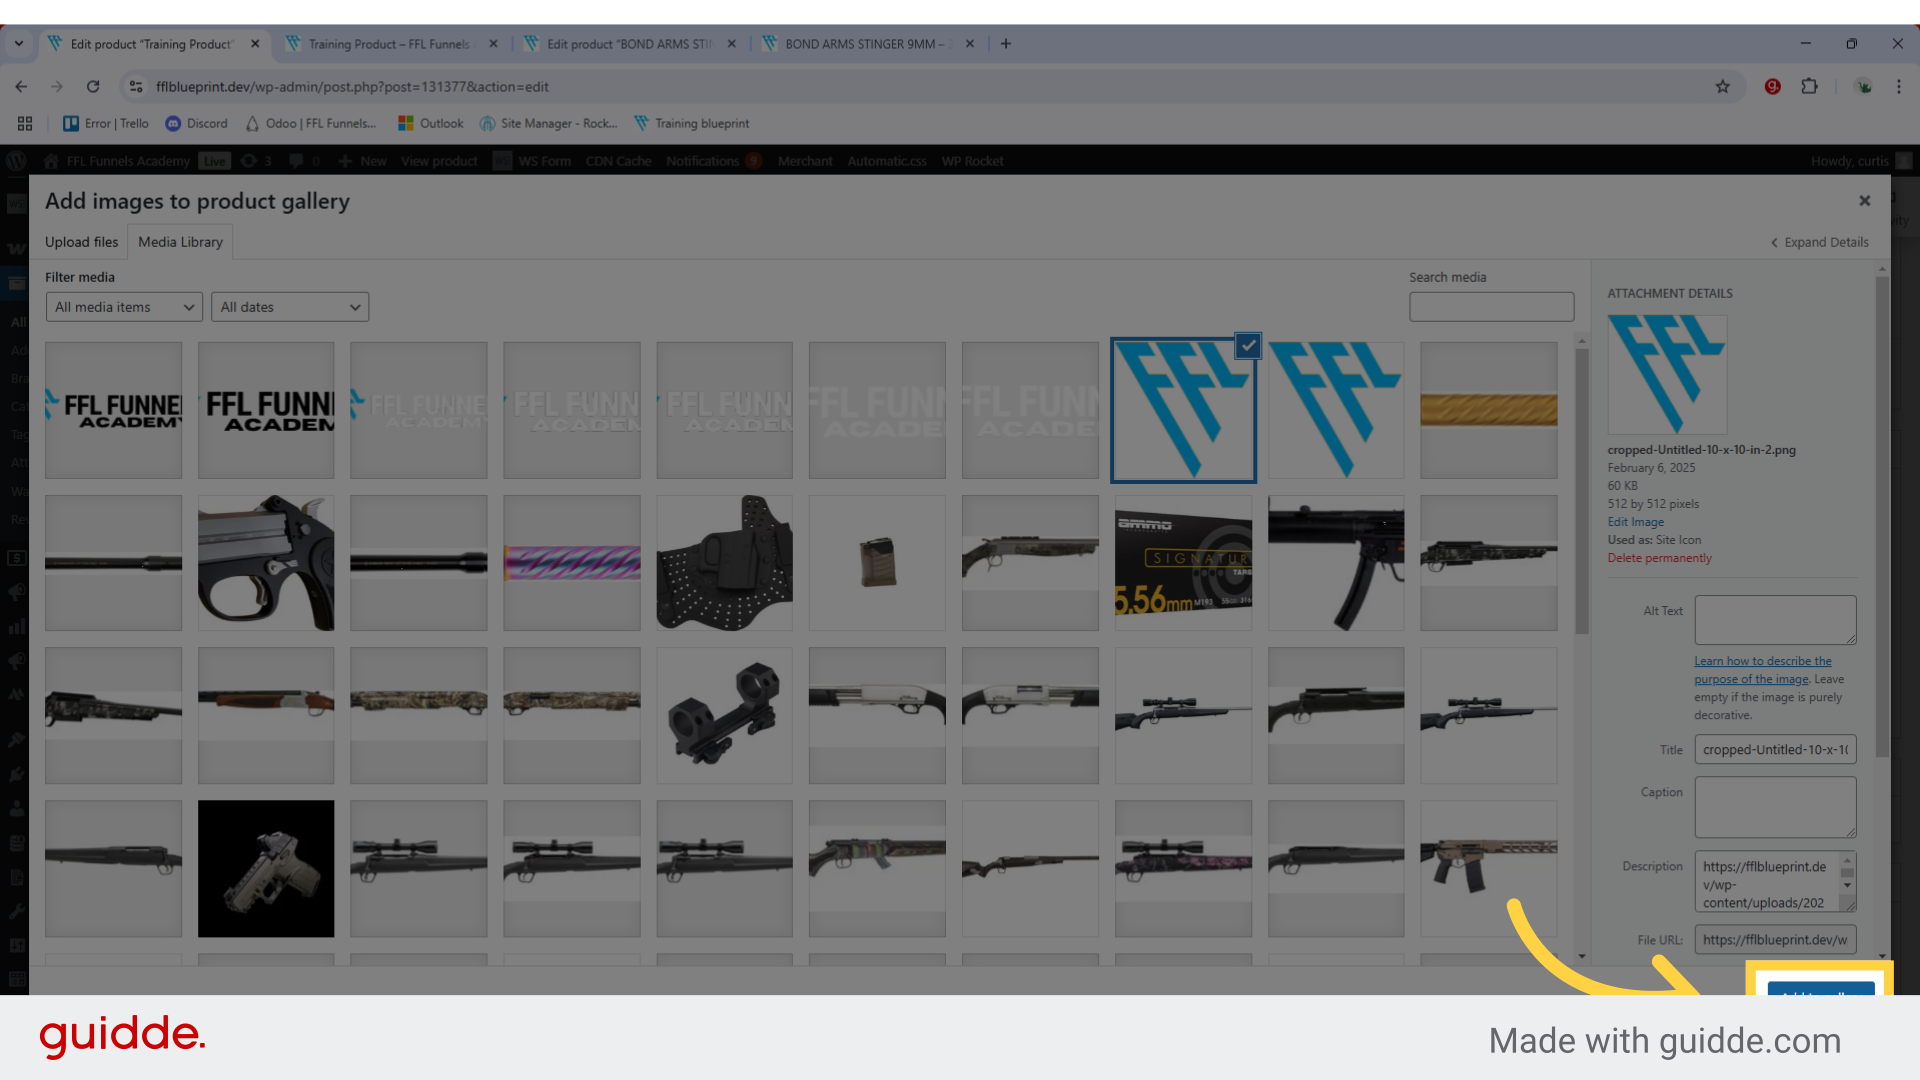
9. Select the images then select "Add to gallery"
Click 'Set product image' to confirm your selection. Pro Tip: Select multiple images at once by holding Ctrl (Windows) or Command (Mac) and select the images you would like to use
10. Gallery images will be displayed
Arrange images Drag and drop images to reorder them The first image will appear first in the gallery Click the 'x' in the corner of any image to remove the image.
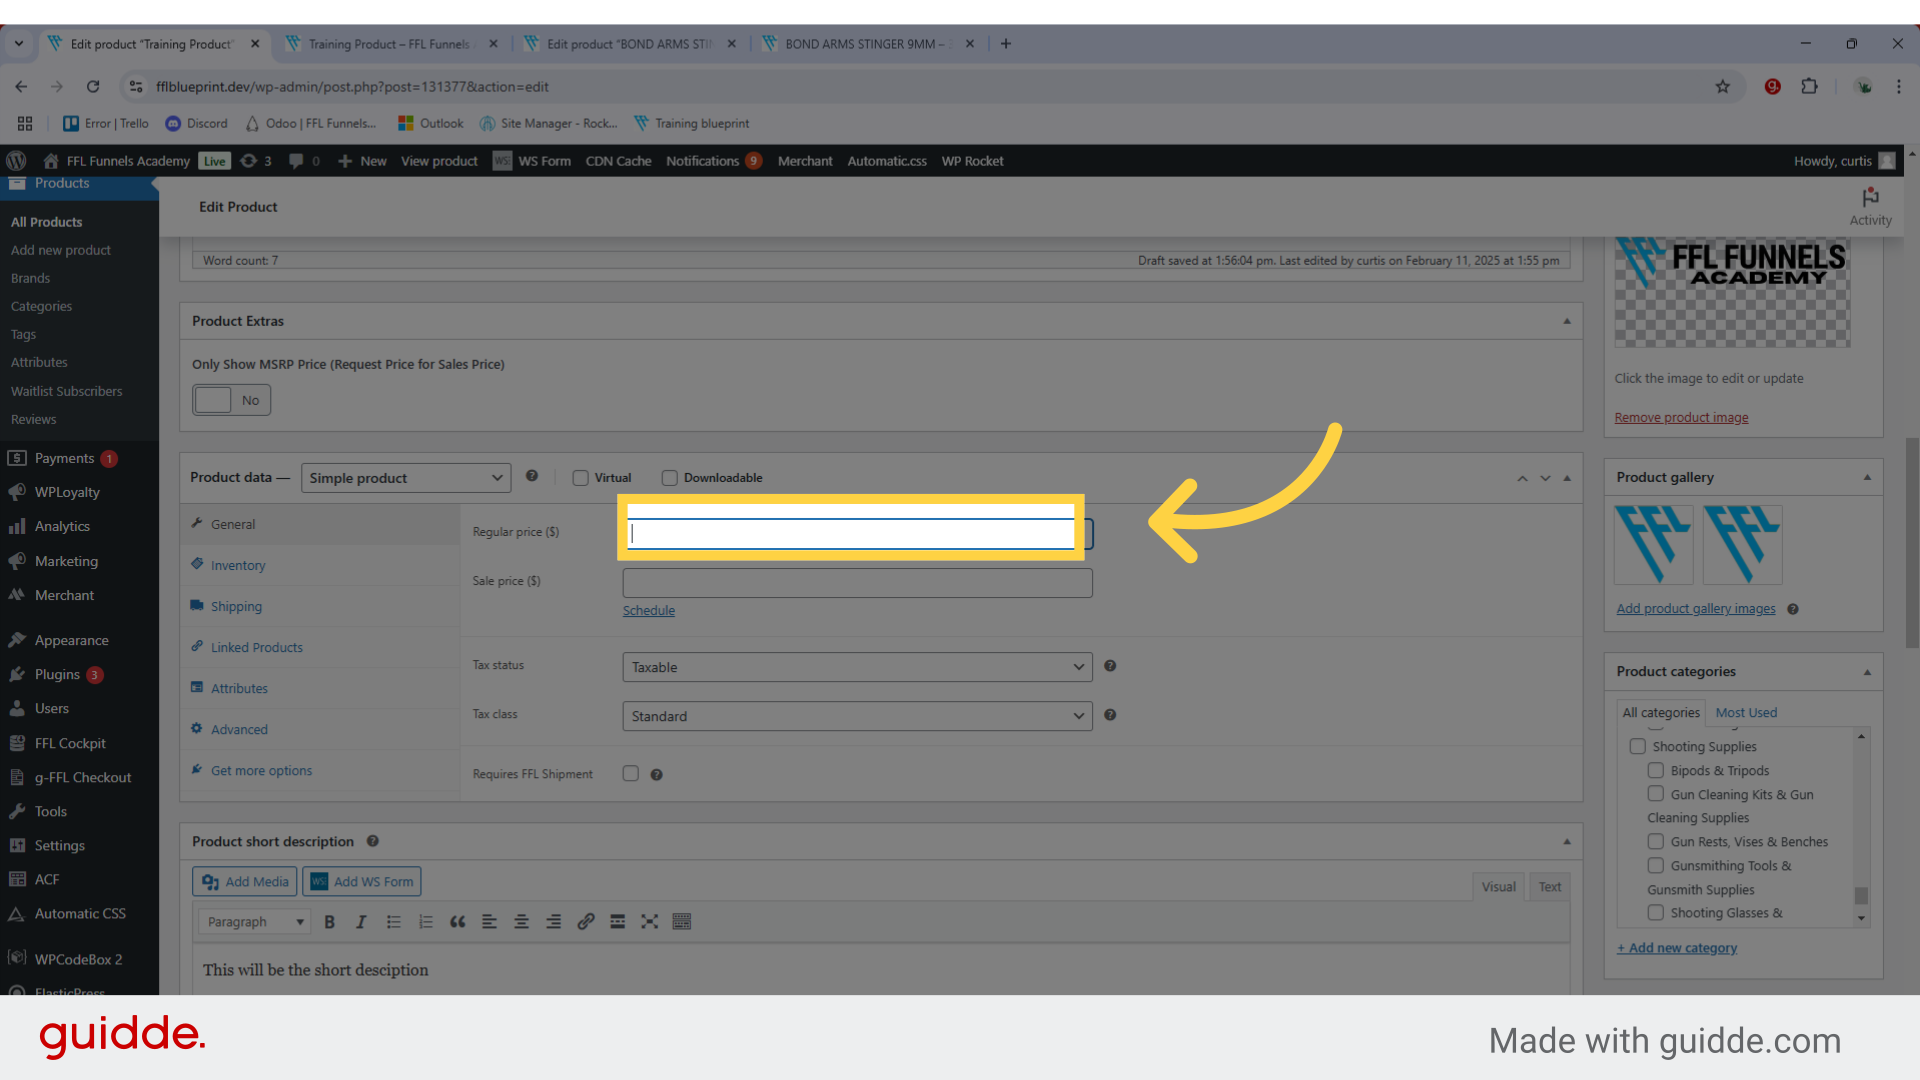
11. Add Price
Add the regular Price: The Regular Price is the standard retail price at which you list and sell your product on your website, before any sales, discounts, or special promotions are applied.
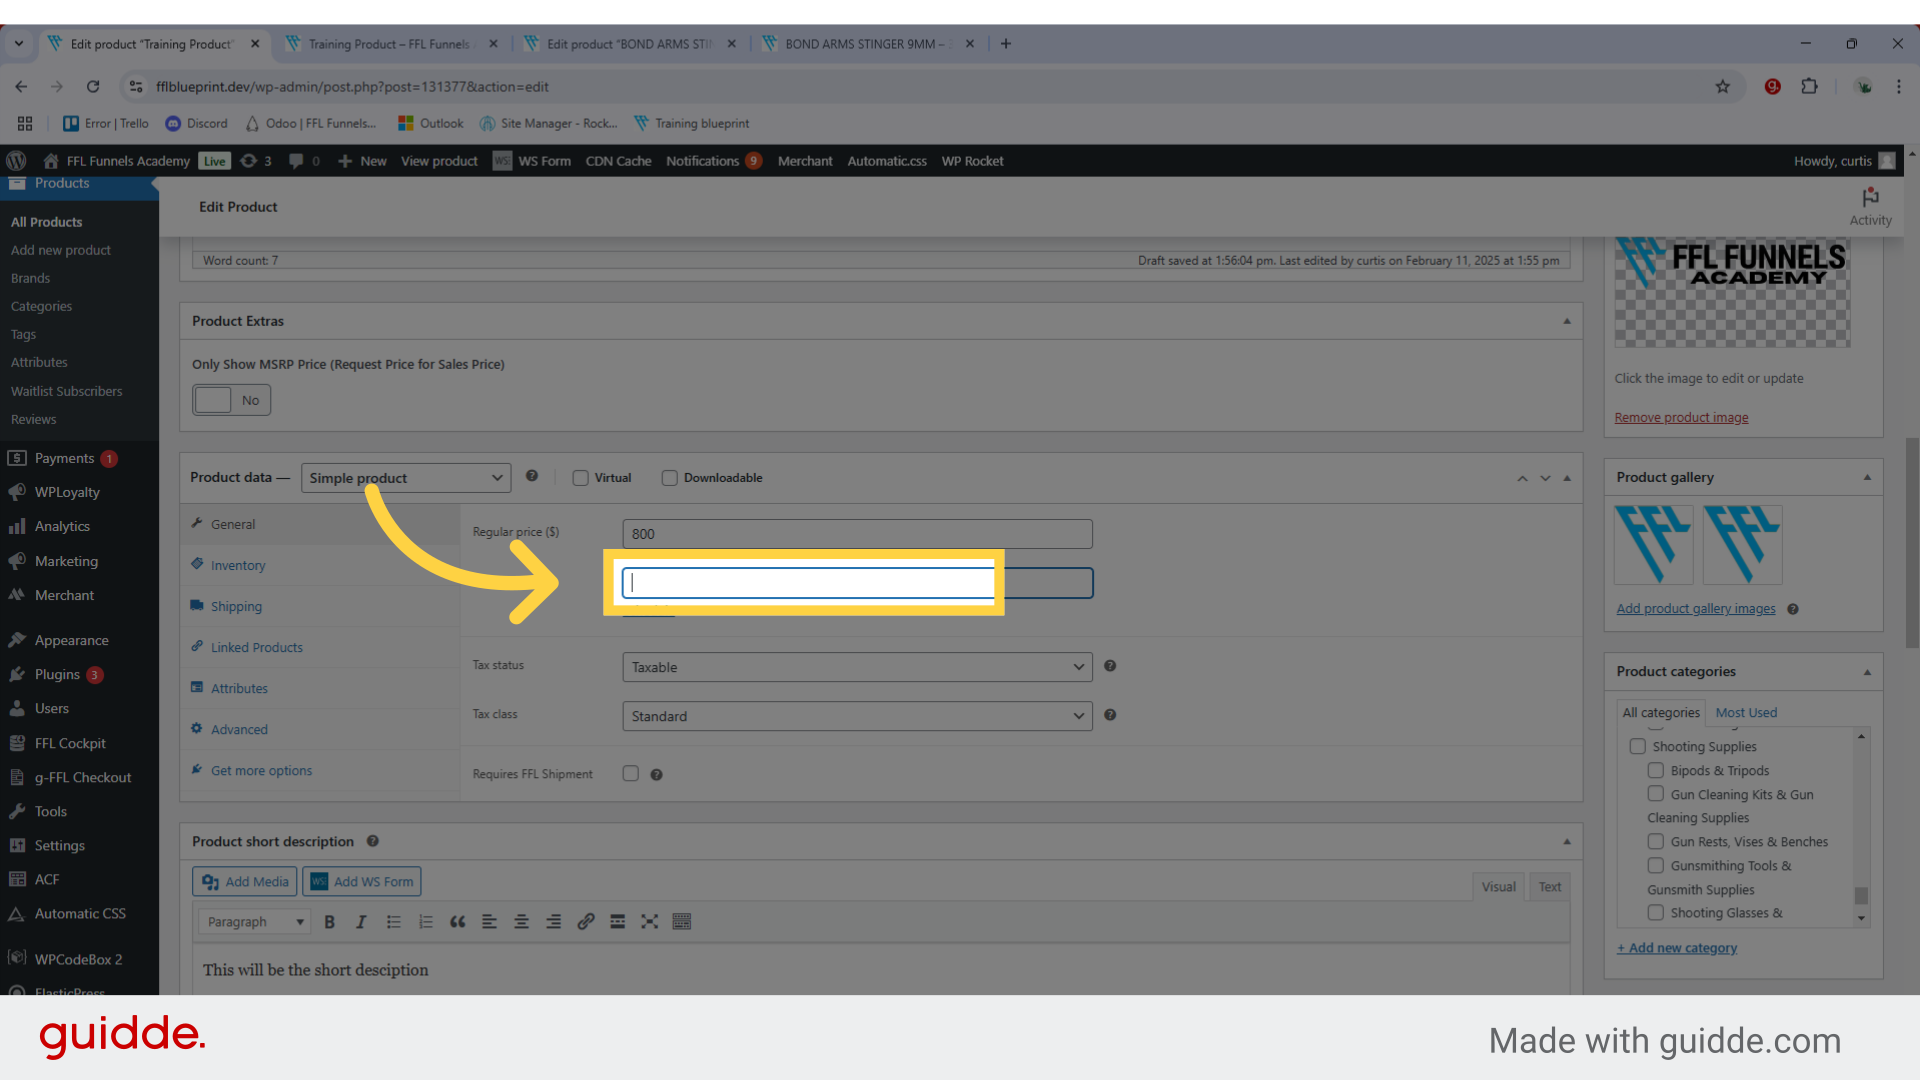
12. Add Sale Price
Add the sale price. The Sale Price in WordPress is a discounted price that you can set for your products when using WooCommerce. When you enter both a Regular Price and a Sale Price, WordPress will: Display both prices on your product page, with the Sale Price shown prominently and the Regular Price shown with a strikethrough. Automatically calculate and display the savings percentage. Allow you to schedule the sale by setting specific start and end dates.
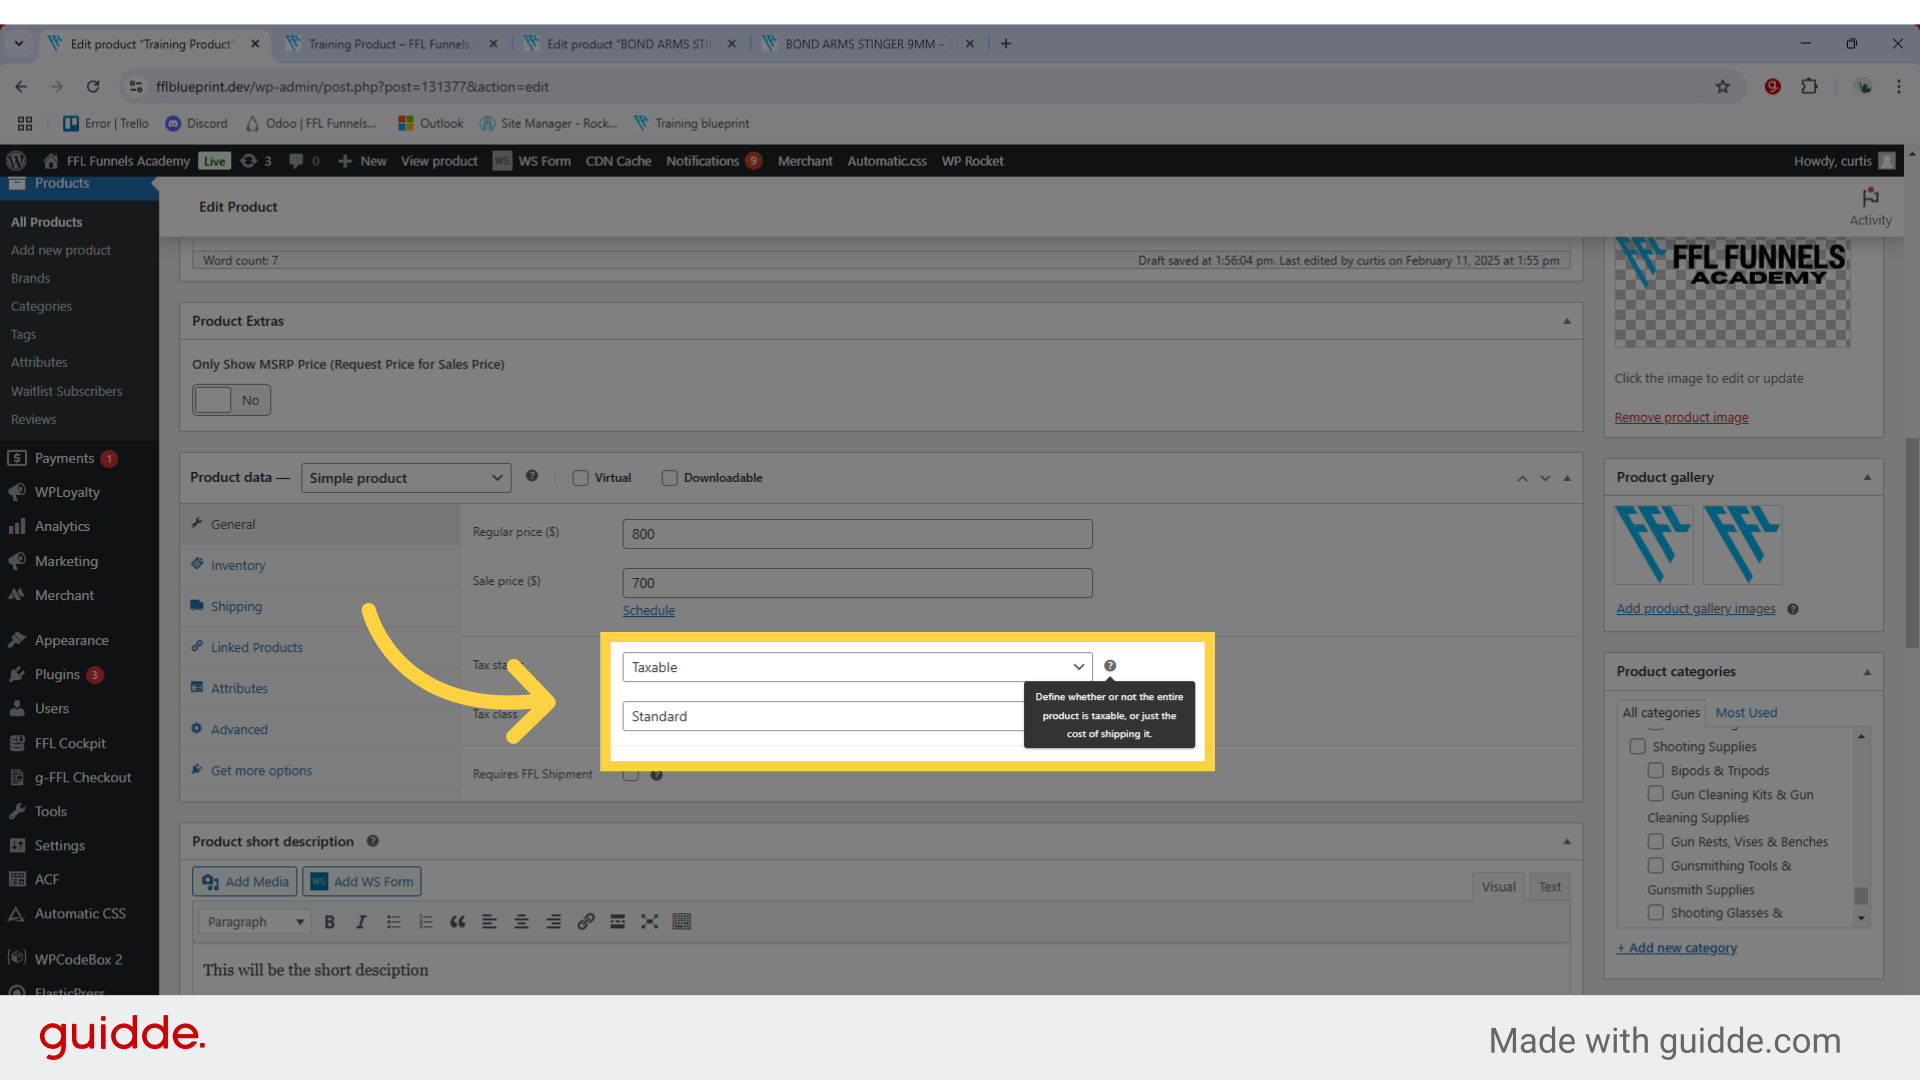
13. Choose the tax status and class
Tax status, and tax class: In WordPress/WooCommerce, the Tax Status and Tax Class settings help you manage how taxes are applied to your products. Here's a breakdown: Tax Status options: Taxable - The product will have tax calculated based on your store's tax settings. Shipping Only - Only the shipping cost will be taxed, not the product itself None - No tax will be calculated for this product. Tax Classes: Standard - The default tax class that applies your store's standard tax rate. Reduced Rate - For products that qualify for a lower tax rate. Zero Rate - For products that are specifically tax-exempt. Custom tax classes - You can create additional tax classes for specific rates or rules.
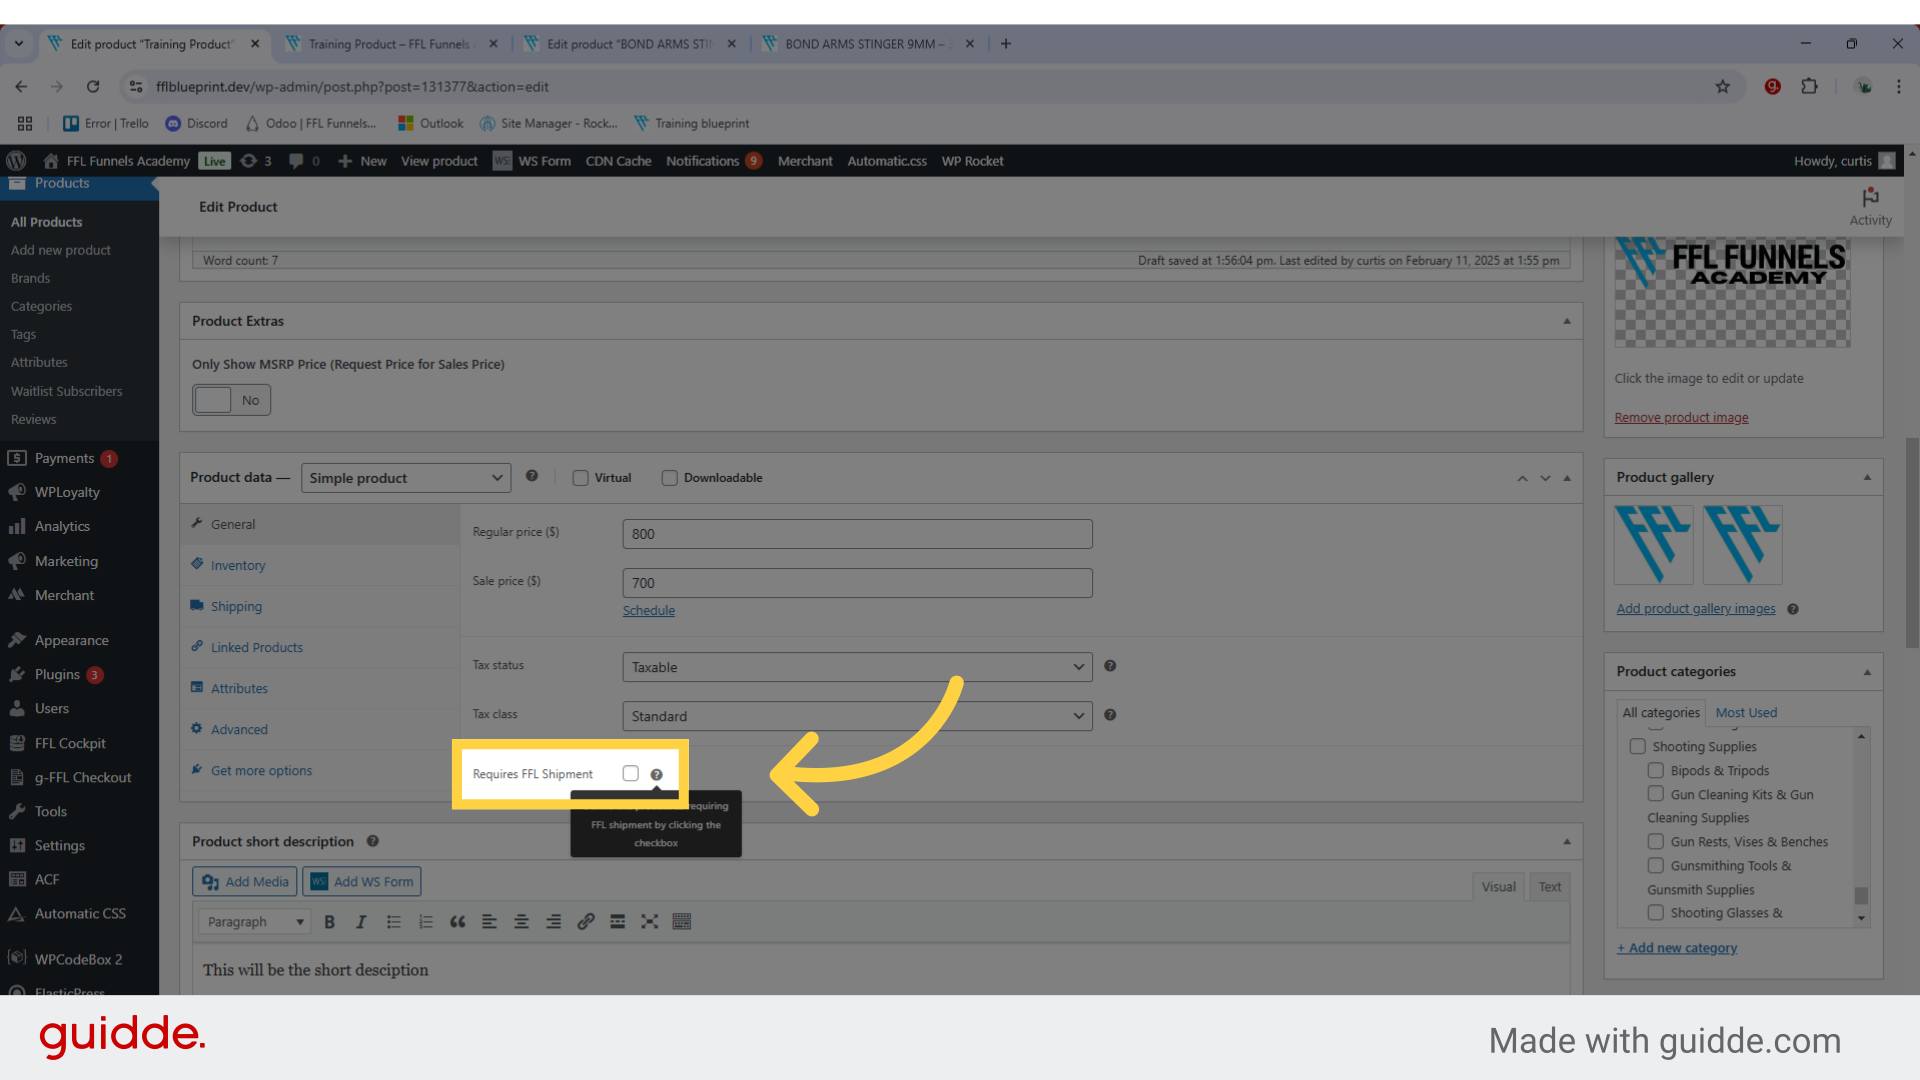
14. Select "Requires FFL Shipment" if product is a Firearm
Select "Requires Firearm Shipment" for any firearm products. This setting activates the FFL Checkout process, requiring customers to select a licensed Federal Firearms License (FFL) dealer for shipment during checkout.
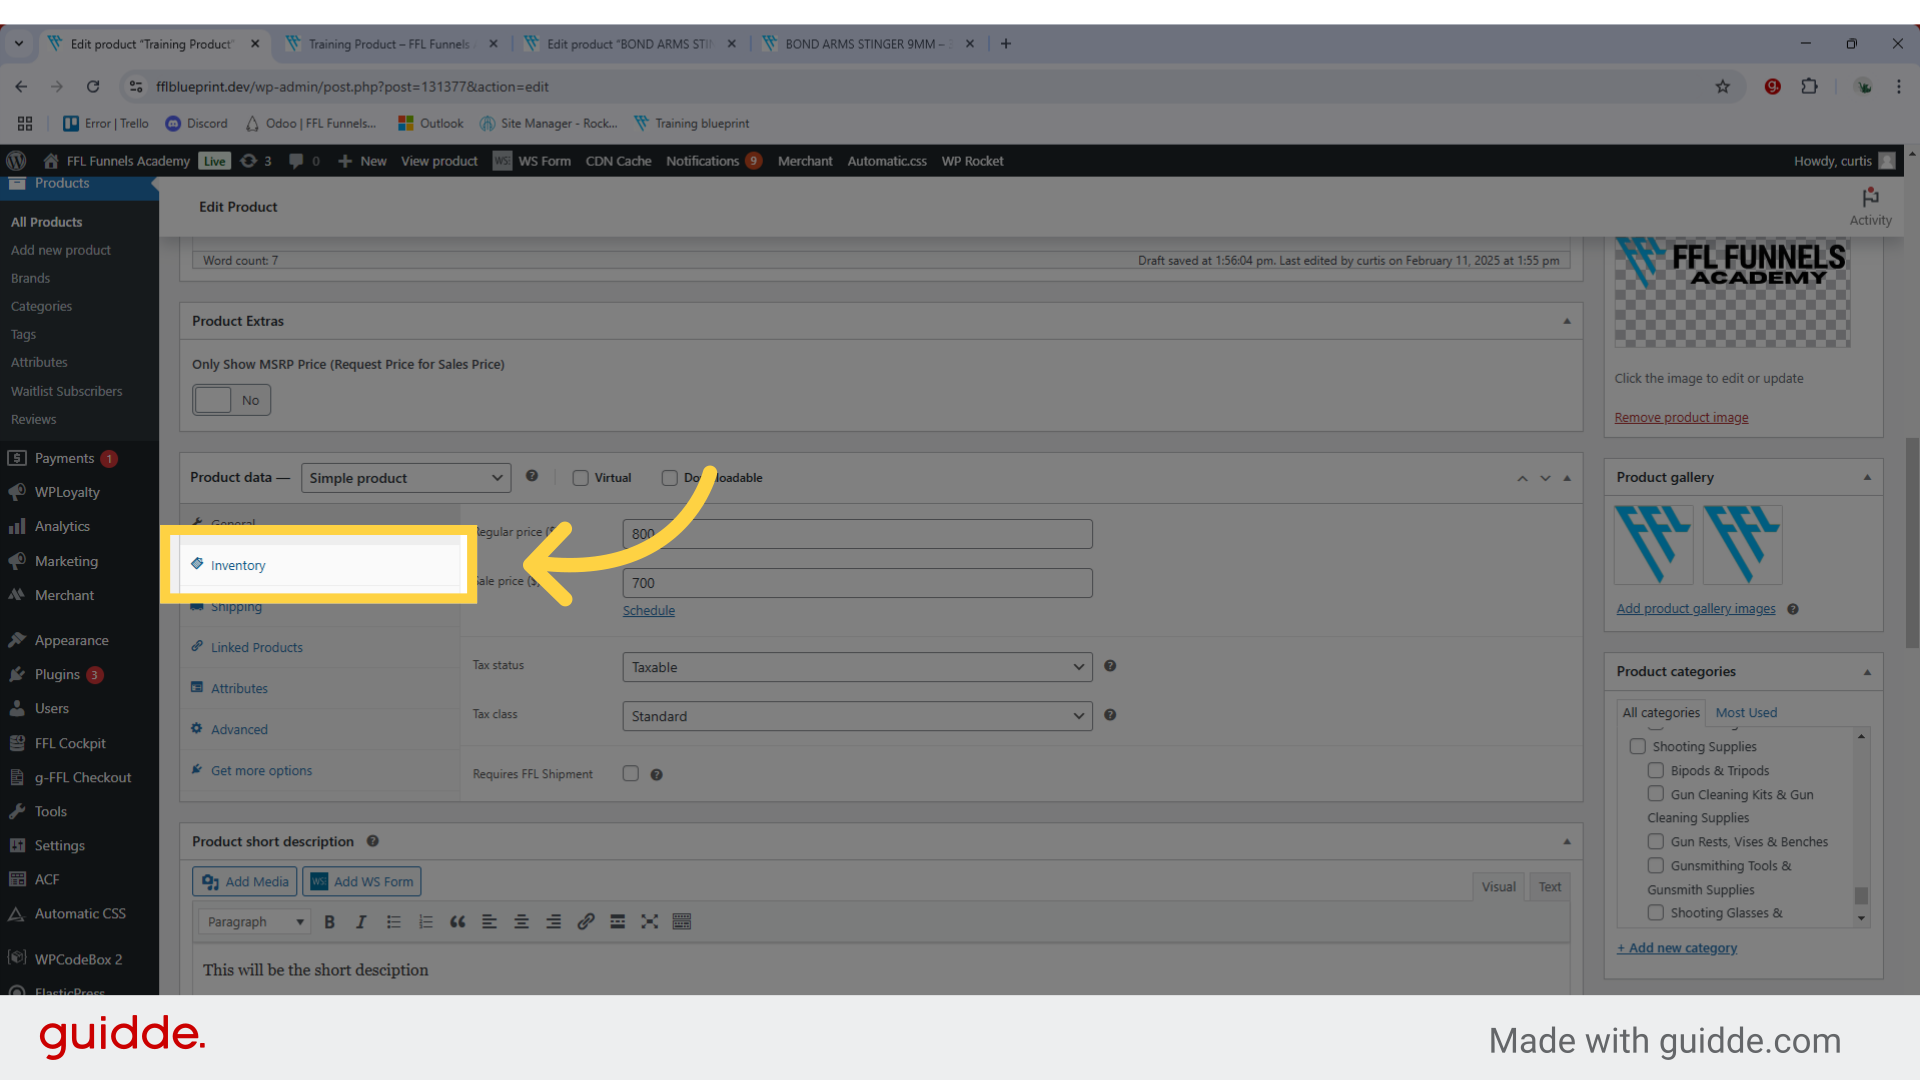
15. Click "Inventory"
Within the new product, select the inventory tab. The Inventory tab in WordPress/WooCommerce product creation helps you manage your product stock.
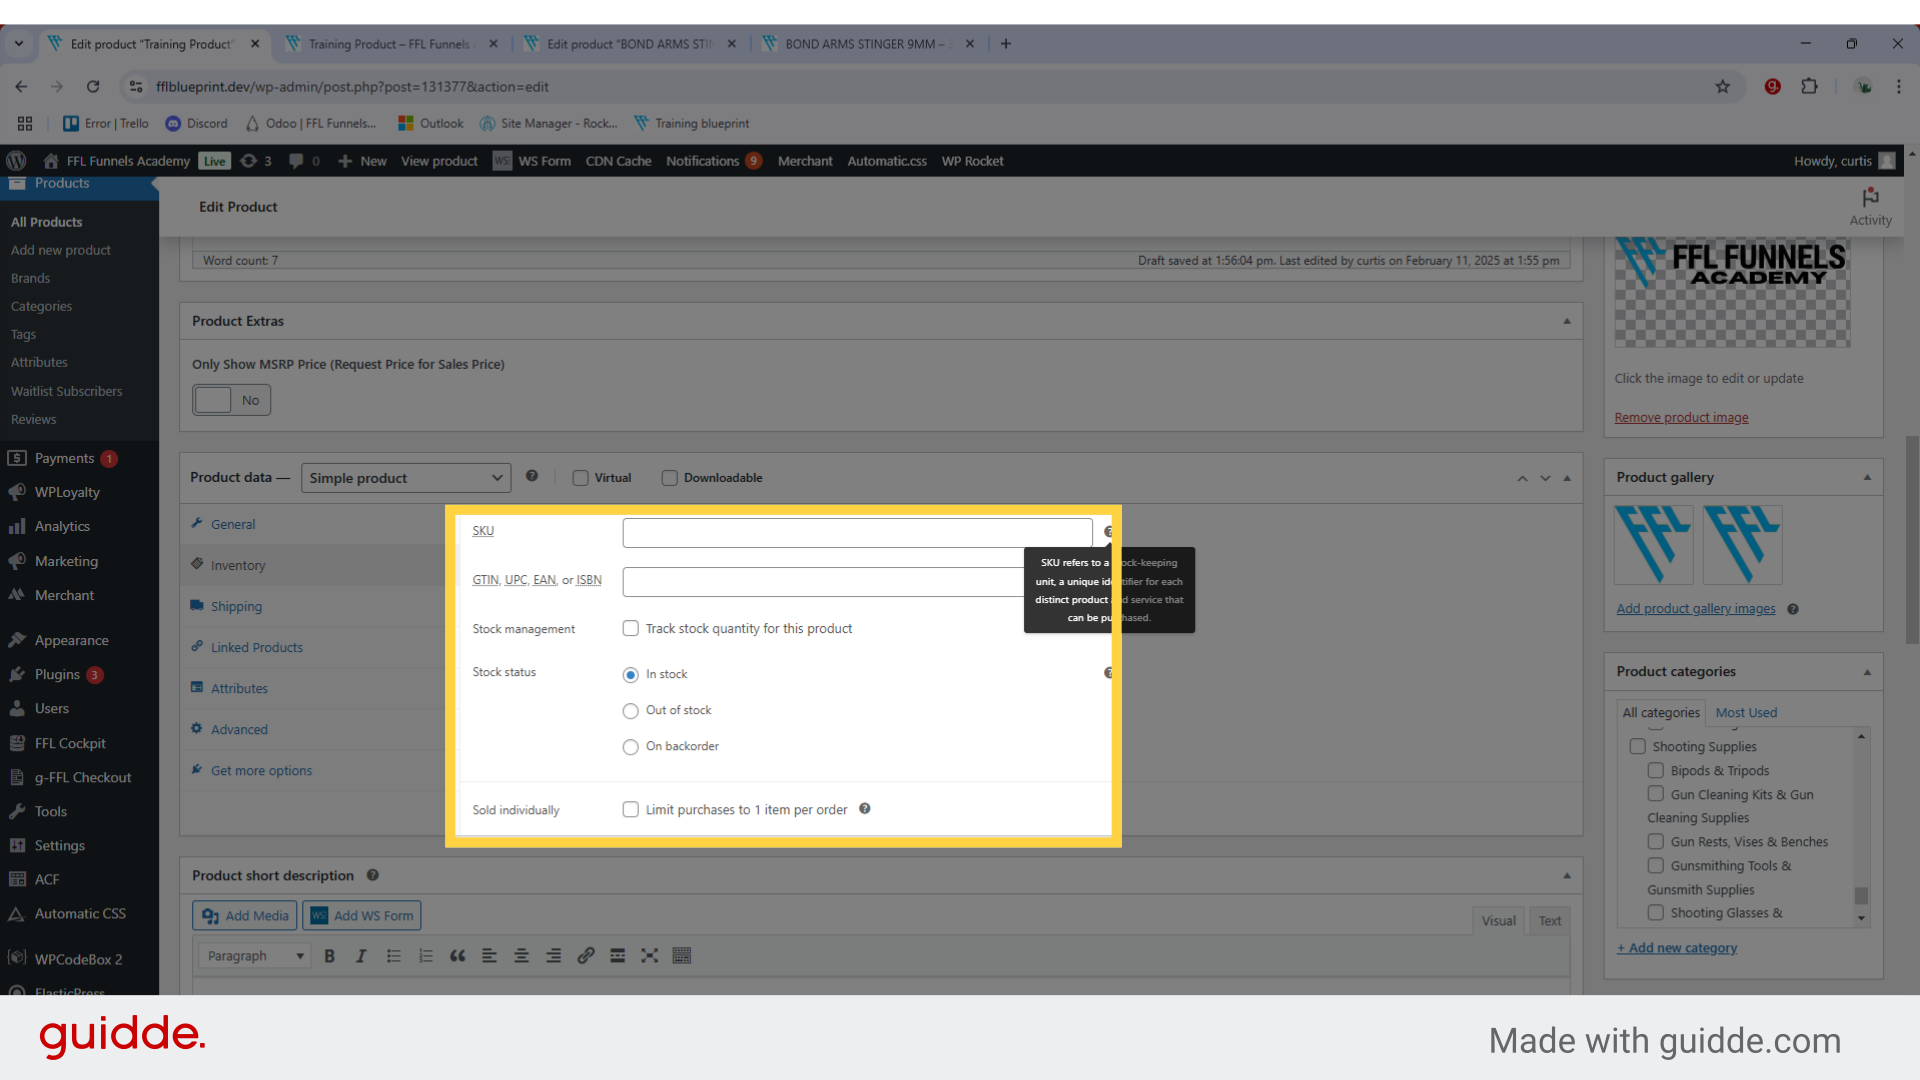
16. Click here
Here's a detailed breakdown of the inventory tab: SKU (Stock Keeping Unit): A unique identifier you assign to track individual products. Can contain letters, numbers, and special characters Helps with inventory management and product organization. Stock Management Options: Manage Stock - Toggle this to track product quantity - Stock Quantity - Enter the number of items available. - Allow Backorders - Choose how to handle out-of-stock situations: - Do not allow. - Allow but notify customers. - Allow without notification. Low Stock Threshold - Set a number to receive alerts when stock reaches this level. For example, Set a Low Stock Threshold of 5 if you want to receive an alert when any product's stock reaches 5 units remaining. This helps you reorder inventory before running out completely. Stock Status (if not managing stock): -In stock -Out of stock -On backorder Sold Individually Option -When enabled, limits customers to buying only one unit per order -Useful for unique items or products with limited availability Location: -Optional field to specify where the product is stored Helpful for warehouses or multiple storage locations. All these settings can be found under Products → Add/Edit Product → Product Data → Inventory tab in your WordPress dashboard.
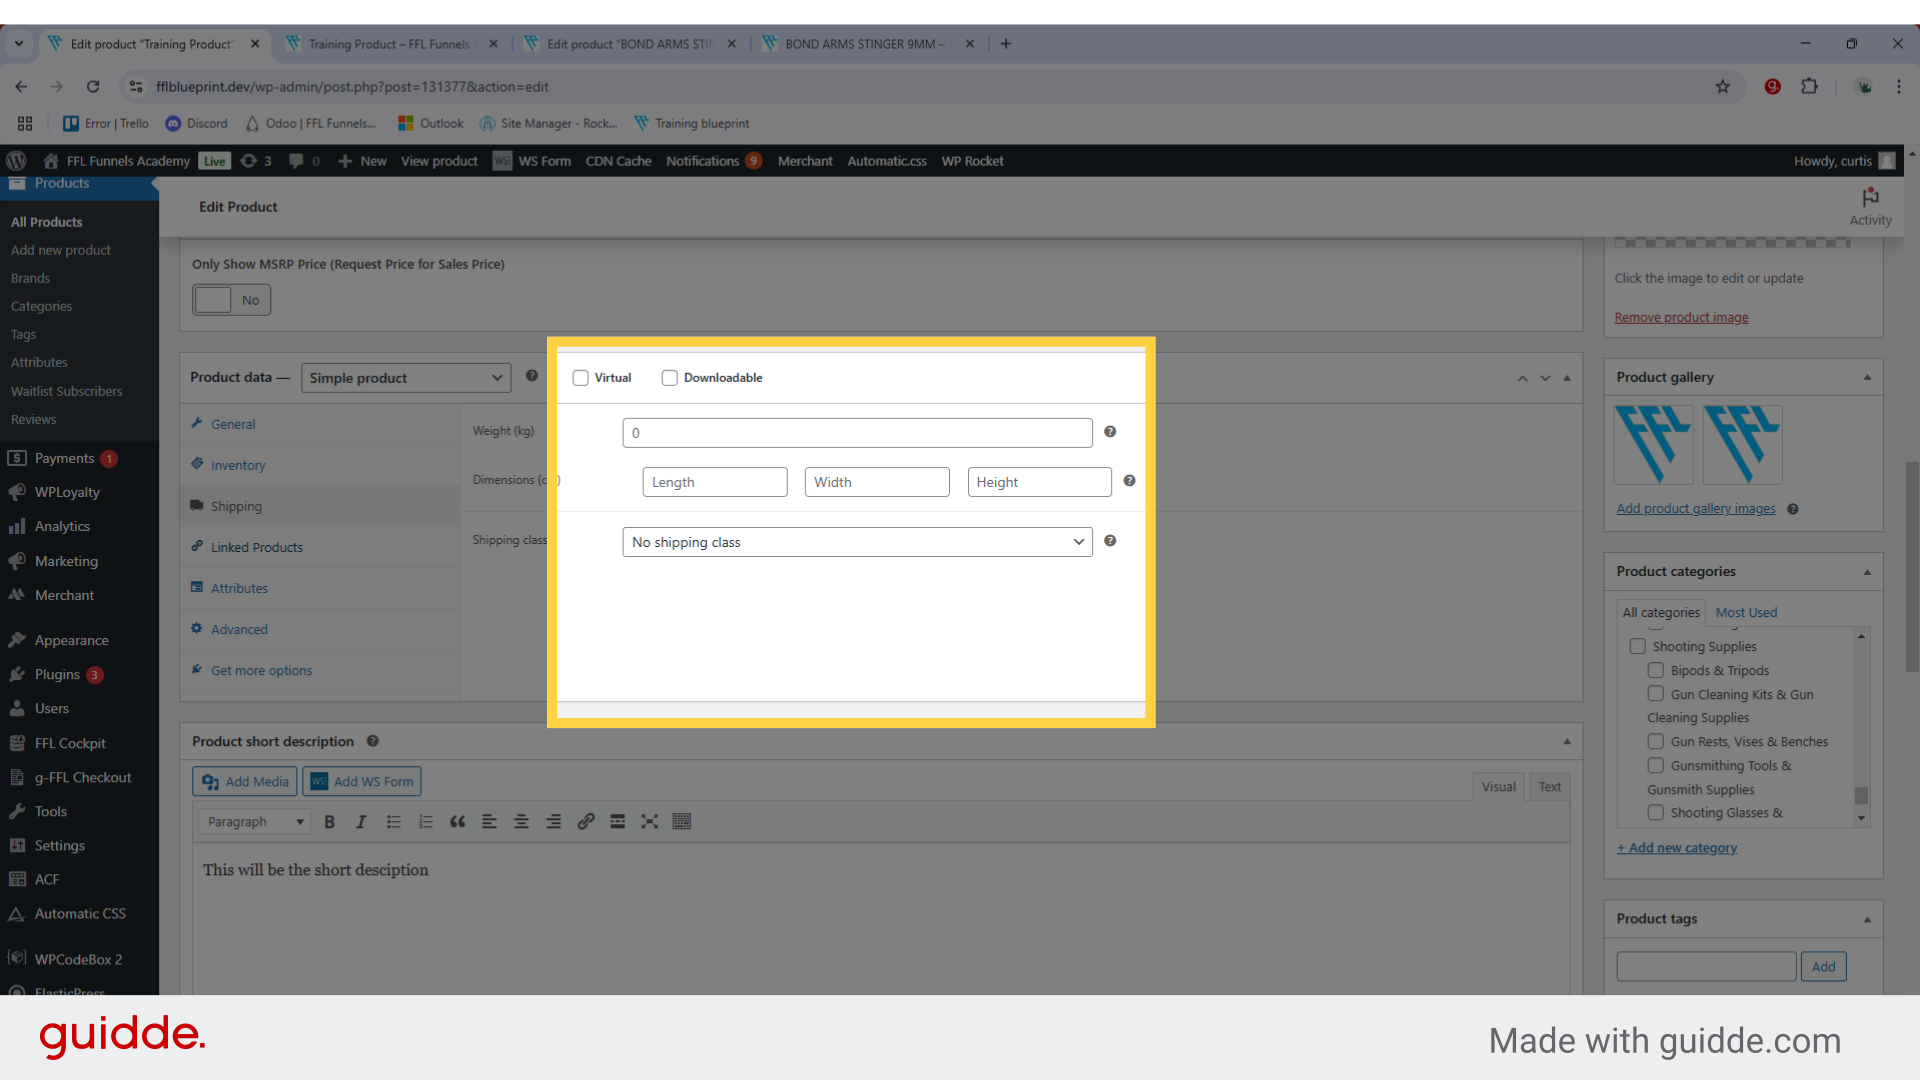
17. Shipping tab
The Shipping tab in WordPress/WooCommerce helps you configure essential shipping settings that determine how products are delivered to customers. This includes product weight, dimensions, shipping class assignments, and special handling requirements.

18. Shipping Settings
Here are the shipping settings you'll find in the WooCommerce product screen: Weight and Dimensions: Enter your product's weight and size Shipping Class: Choose how your product ships (Standard, Bulky, etc.) Virtual Product: Check this if nothing ships physically (like downloads) That's it! Find these under Products → Edit → Shipping tab.
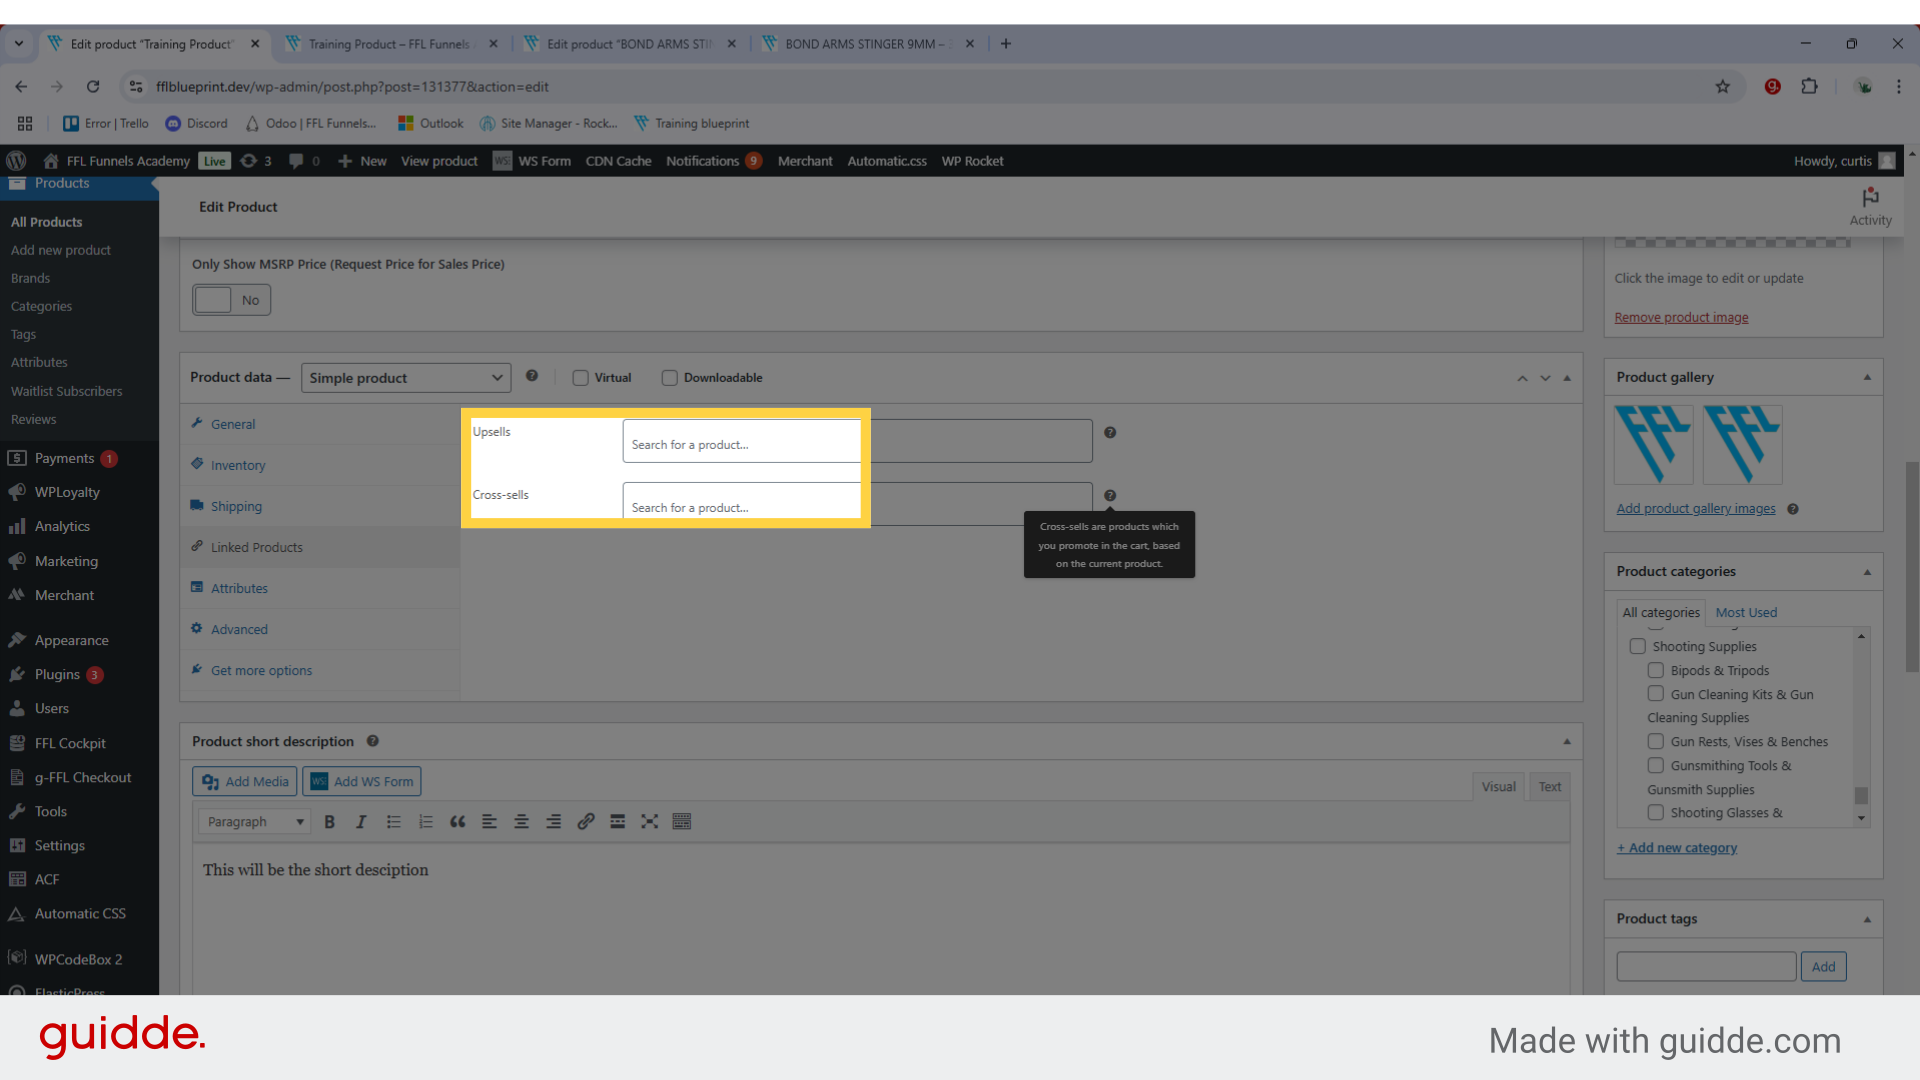
19. Linked products
The Linked Products tab lets you connect related items to your product: Upsells
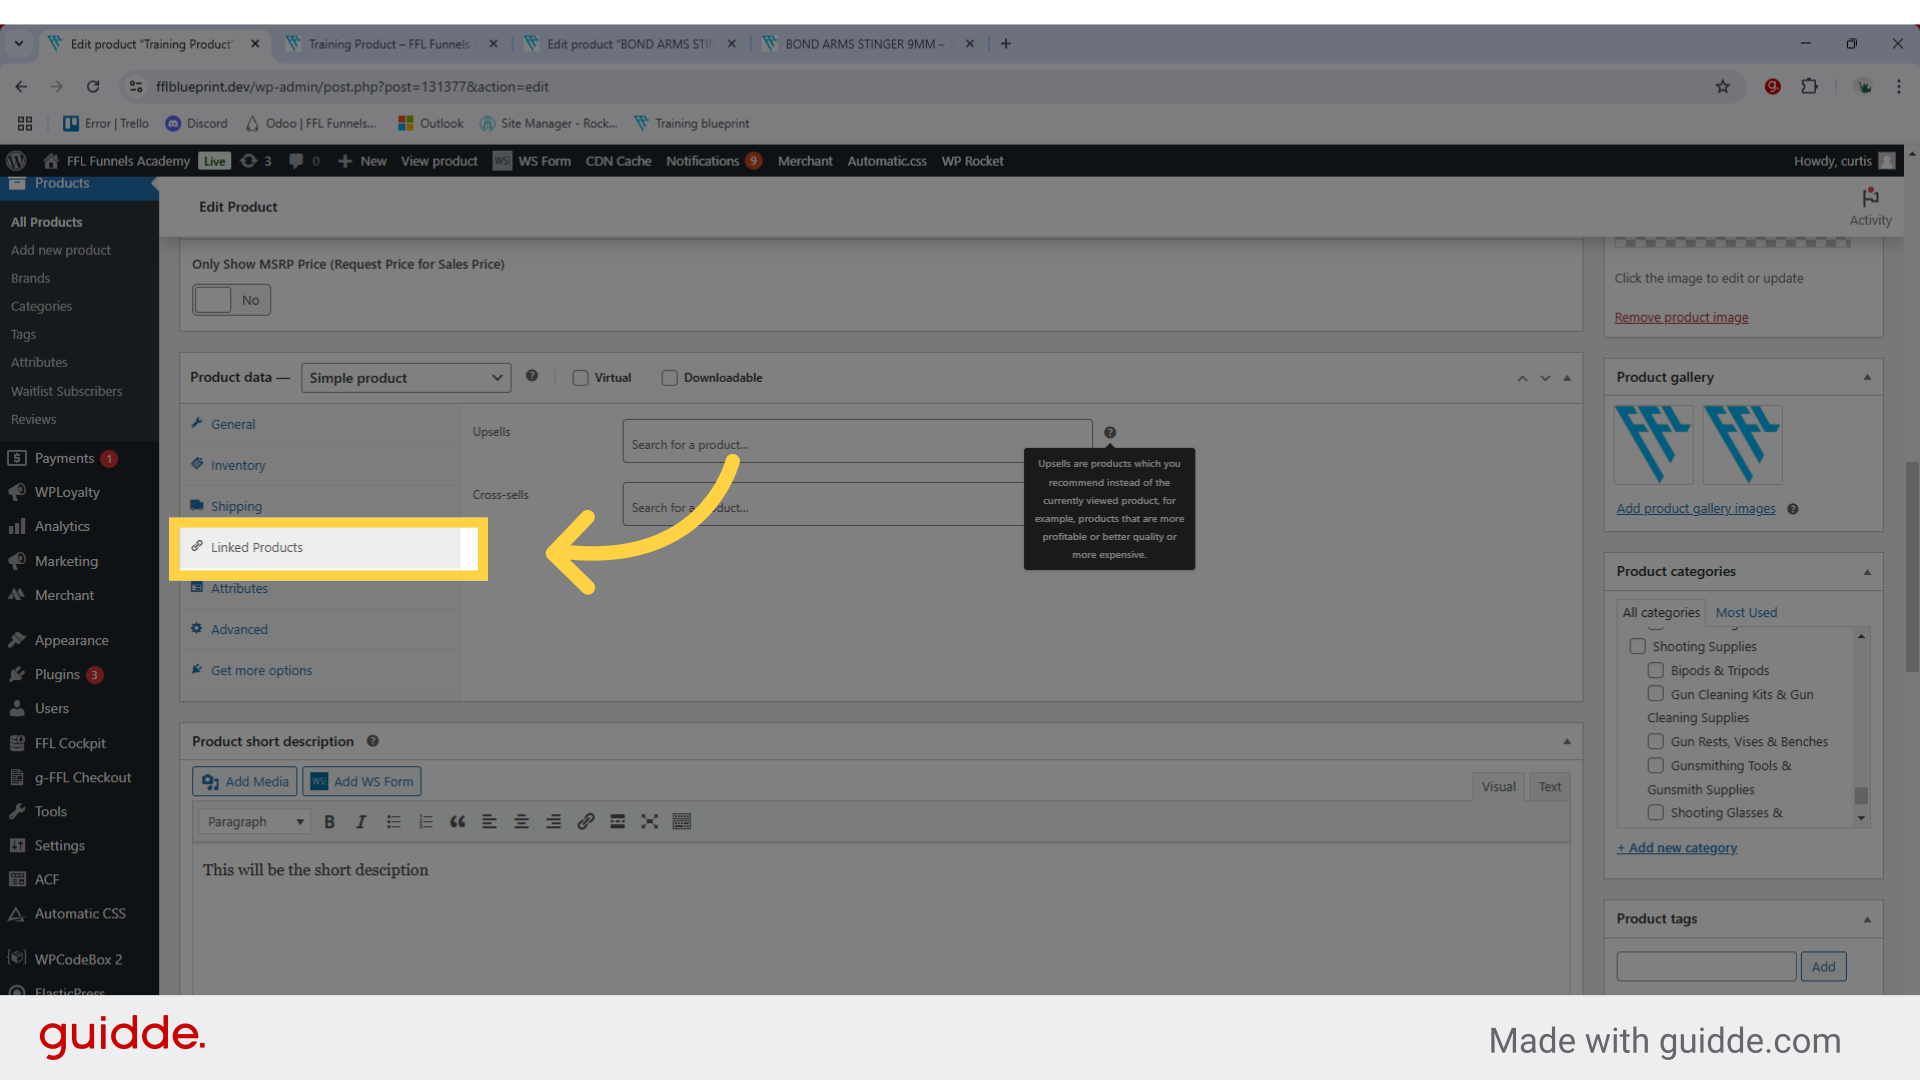
20. Linked Products
Here's a clear explanation of how linked product upsells and cross-sells work: Upsells: Appear on the product page as "You may also like...". Usually higher-end or upgraded versions. Example: Customer views a basic coffee maker → Show them a premium model Cross-sells: Appear on the cart page as "You may be interested in...". Complementary products that go well together. Example: Customer adds coffee maker → Show them coffee filters and beans. Real-world example: Product: Basic hunting rifle. Upsell: Premium version of same rifle. Cross-sell: Ammunition, cleaning kit, scope.
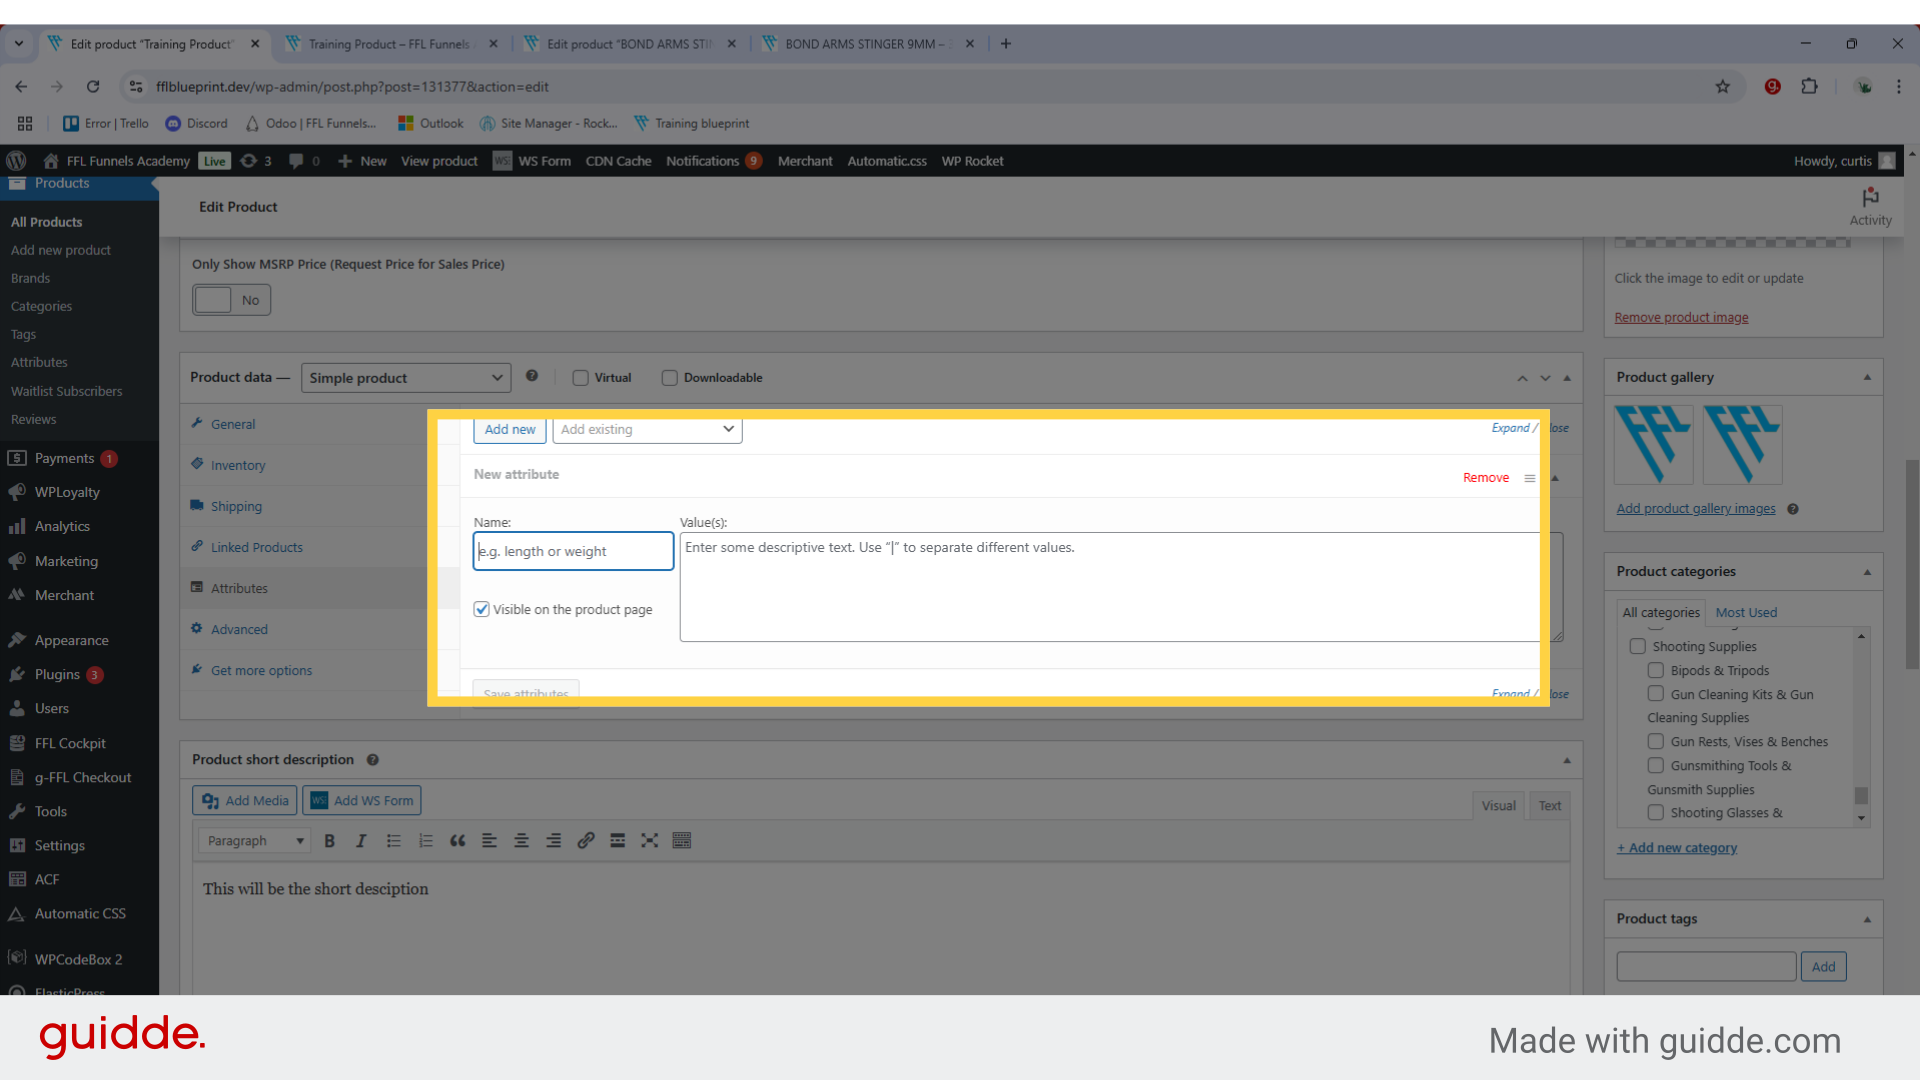
21. "Attributes"
Access the attributes section.
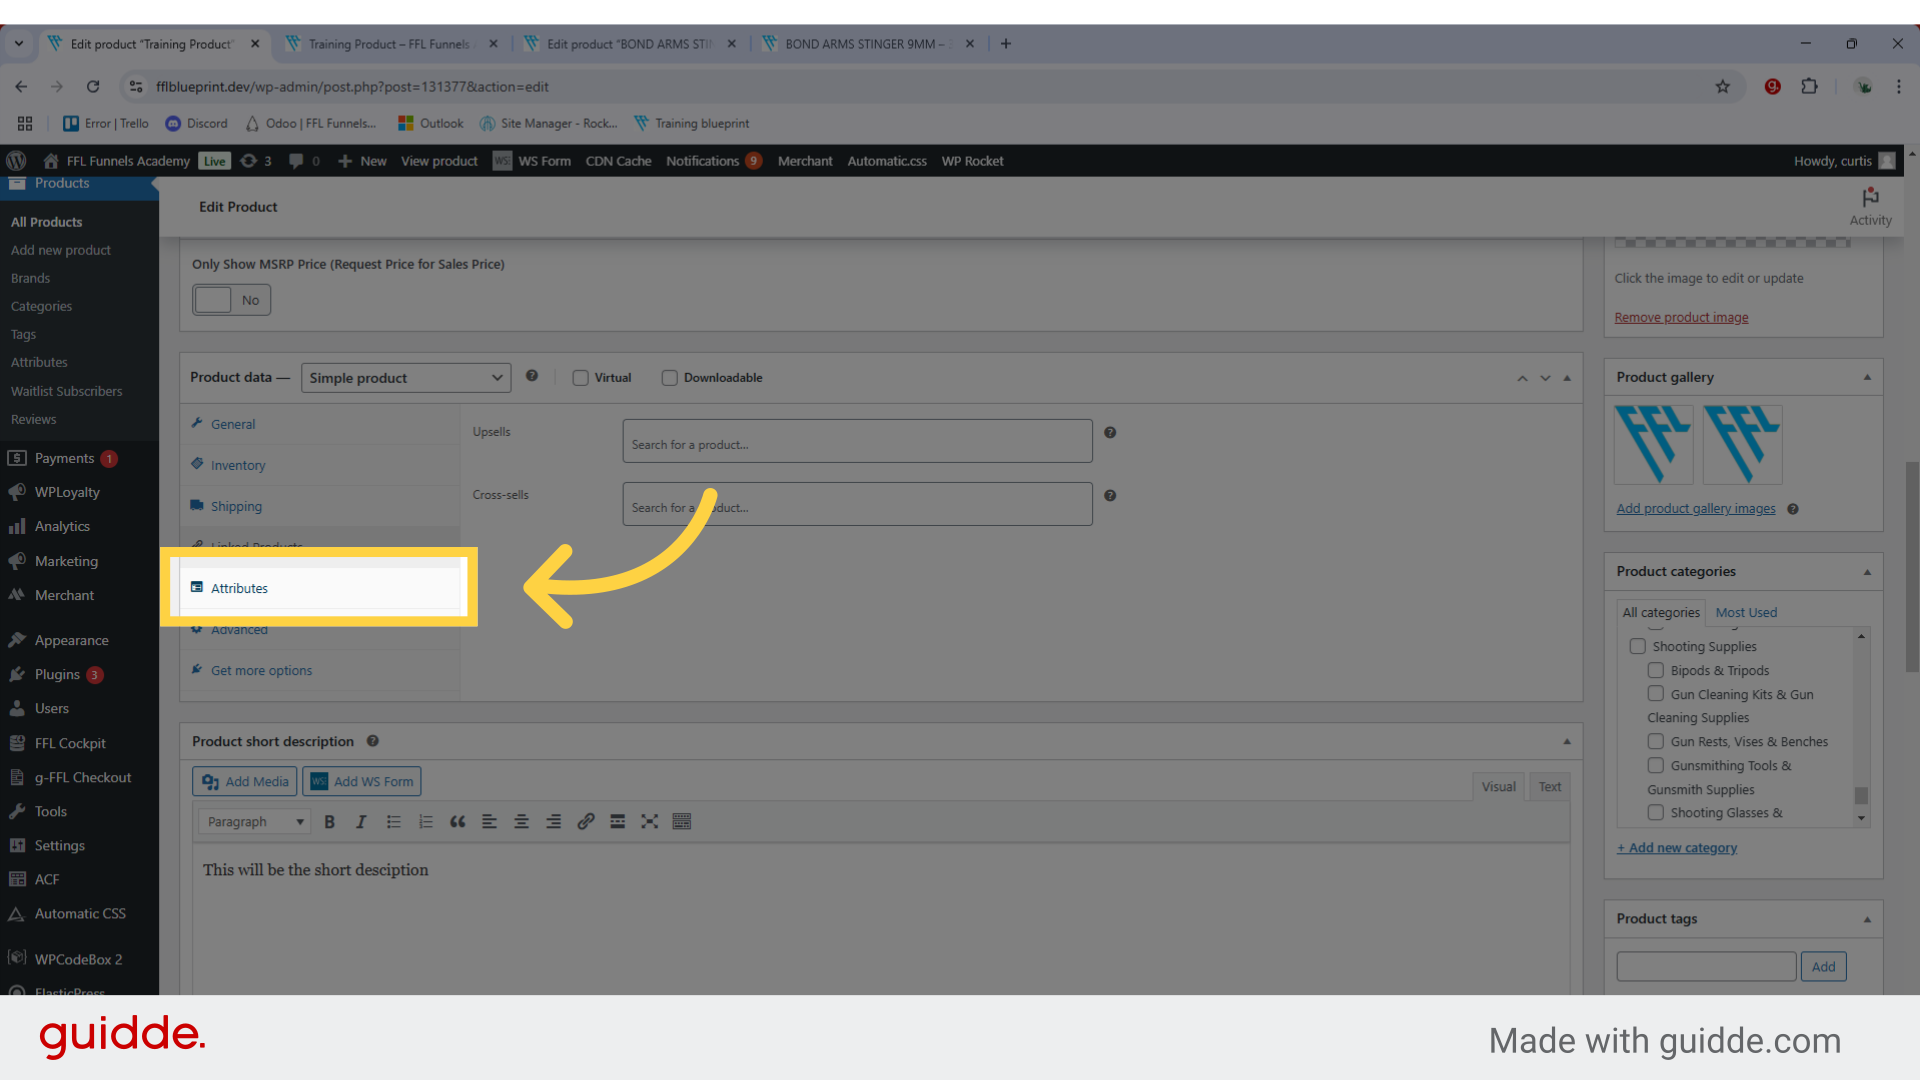
22. Attributes
The Attributes tab helps you set key product details like: Color, Size, and Material. Make products searchable Create variations. Common Firearm Attributes: Caliber: 9mm, .45 ACP, .40 S&W Frame: Polymer, Steel, Aluminum Finish: Black, FDE, Stainless Capacity: 10, 15, 17 Round Find under Products → Edit → Attributes.
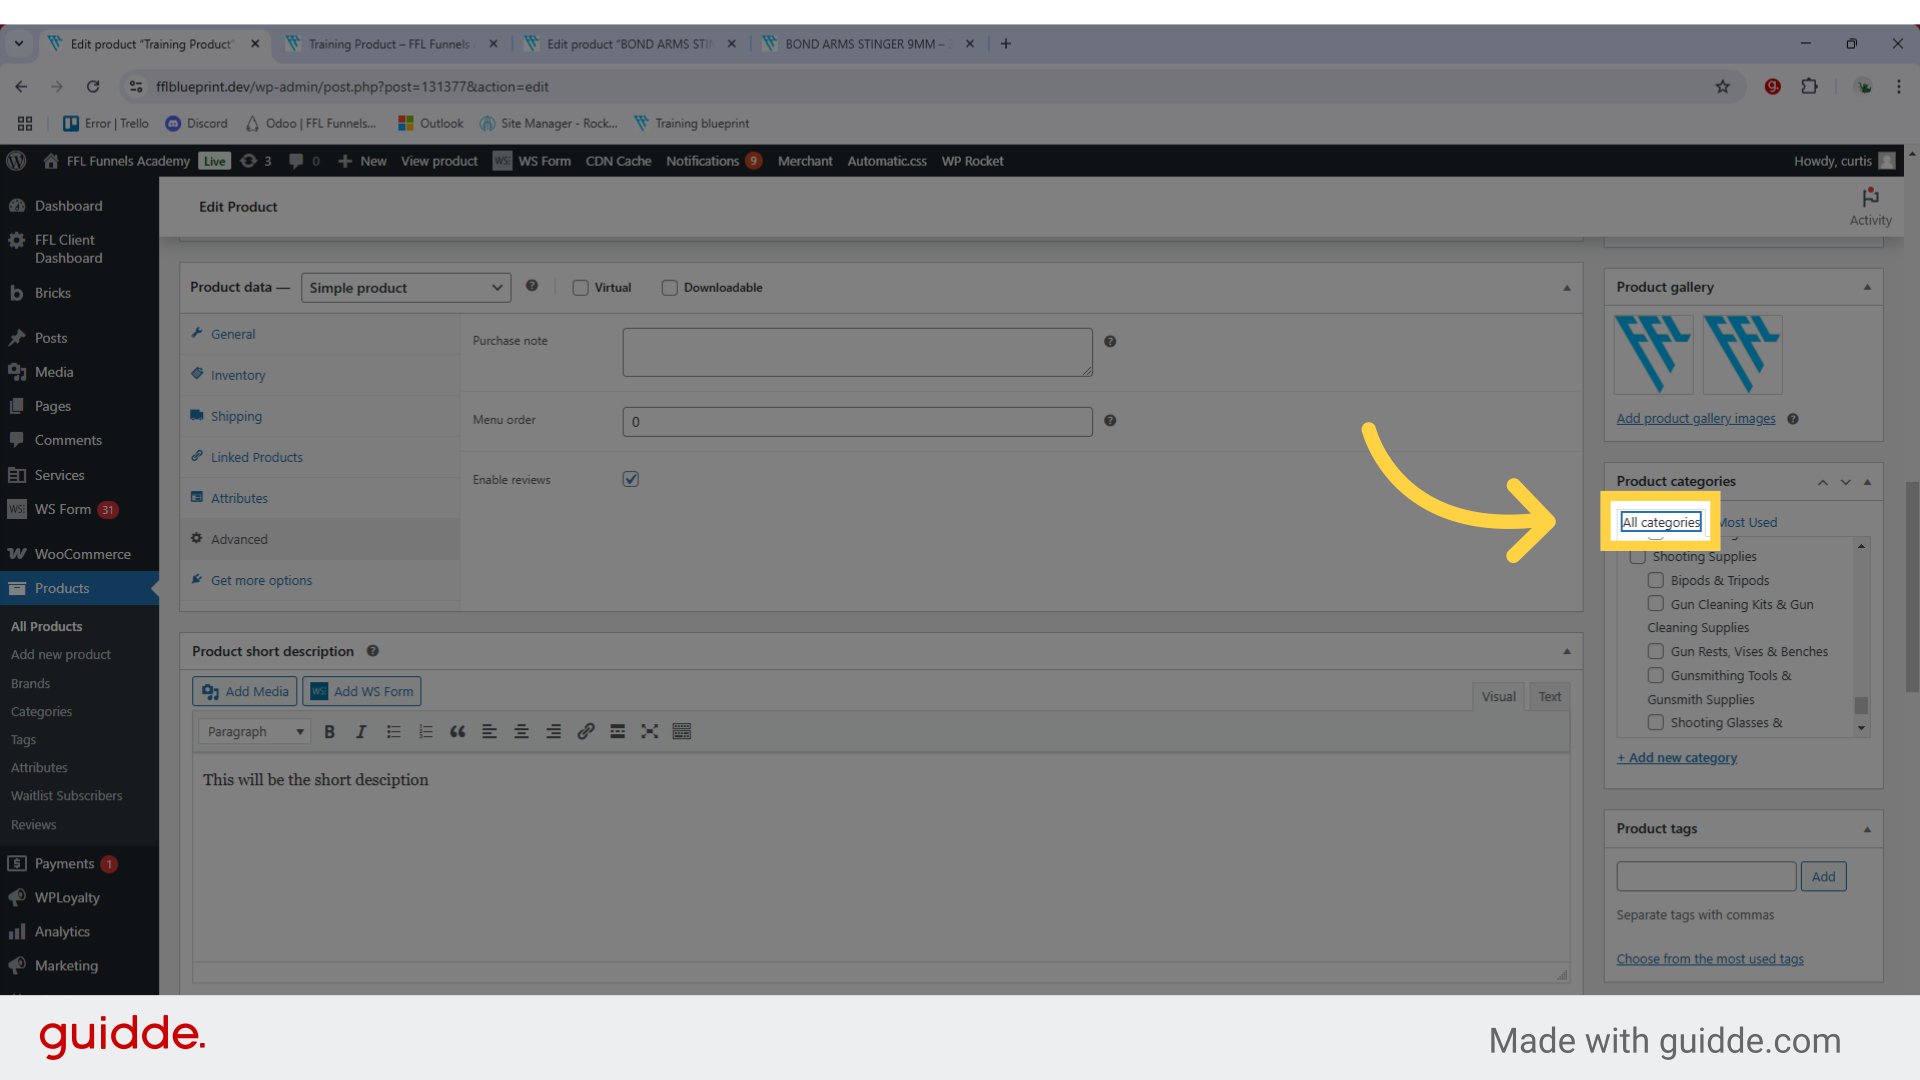
23. "Categories"
Categories help organize your products into groups. For example: Main Categories: Handguns, Rifles, Ammunition, Sub-Categories (grouped under main category): Example: "Semi-Auto" under "Handguns" Example: "Bolt Action" under "Rifles" To select categories: In your product page, find the Categories box on the right Check the boxes for relevant categories Create new ones by clicking "Add new category" Find under Products → Categories (right sidebar). Important: Keep category names and settings unchanged, as modifications will disrupt your website's navigation and product organization. Categories are linked to FFL Cockpit data feeds - changing them will break product synchronization.
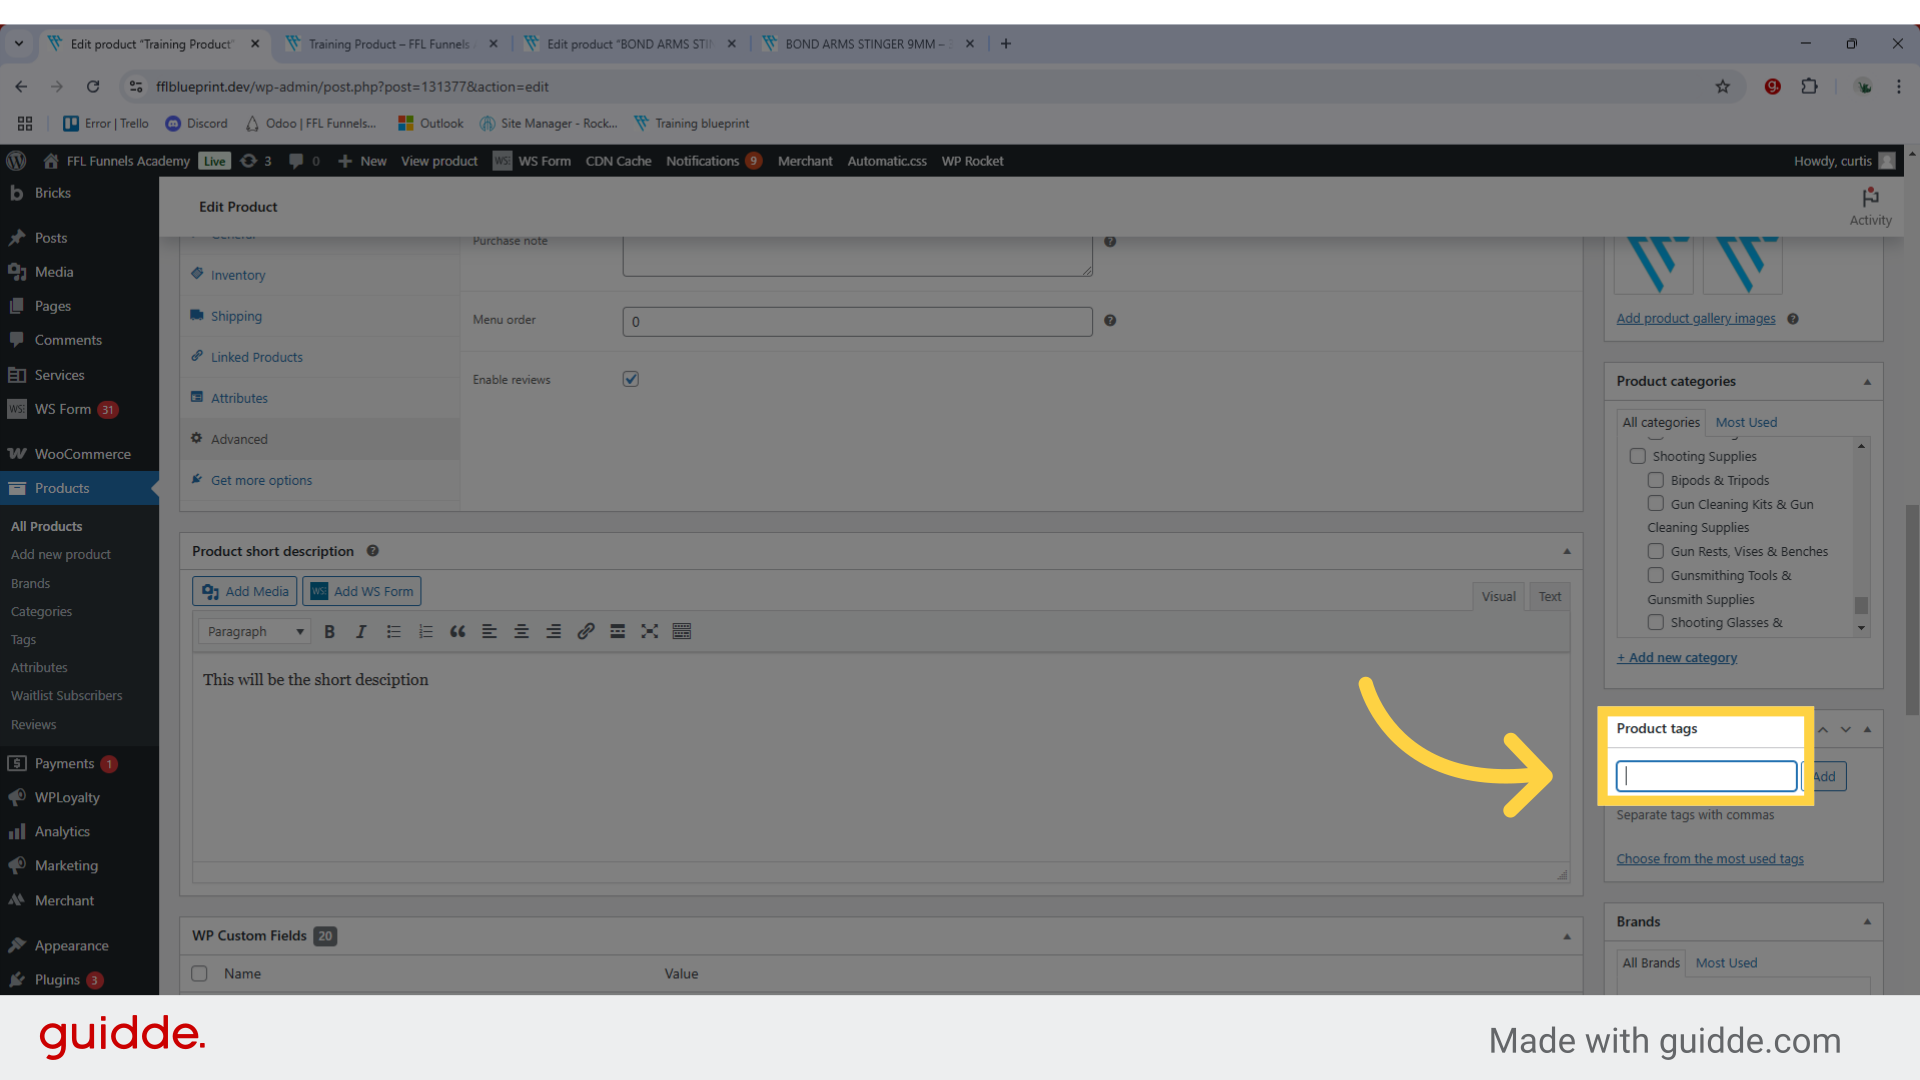
24. Product Tags
Product tags help customers find related items, like keywords. They're more flexible than categories. Example for a Glock 19: Tags: compact, 9mm, striker-fired, concealed carry. Customers can click these tags to find similar products To add tags: Find the "Product Tags" box on the right. Type your tags. Separate each tag with commas. Click "Add". Find under Products → Edit → Product Tags (right sidebar).
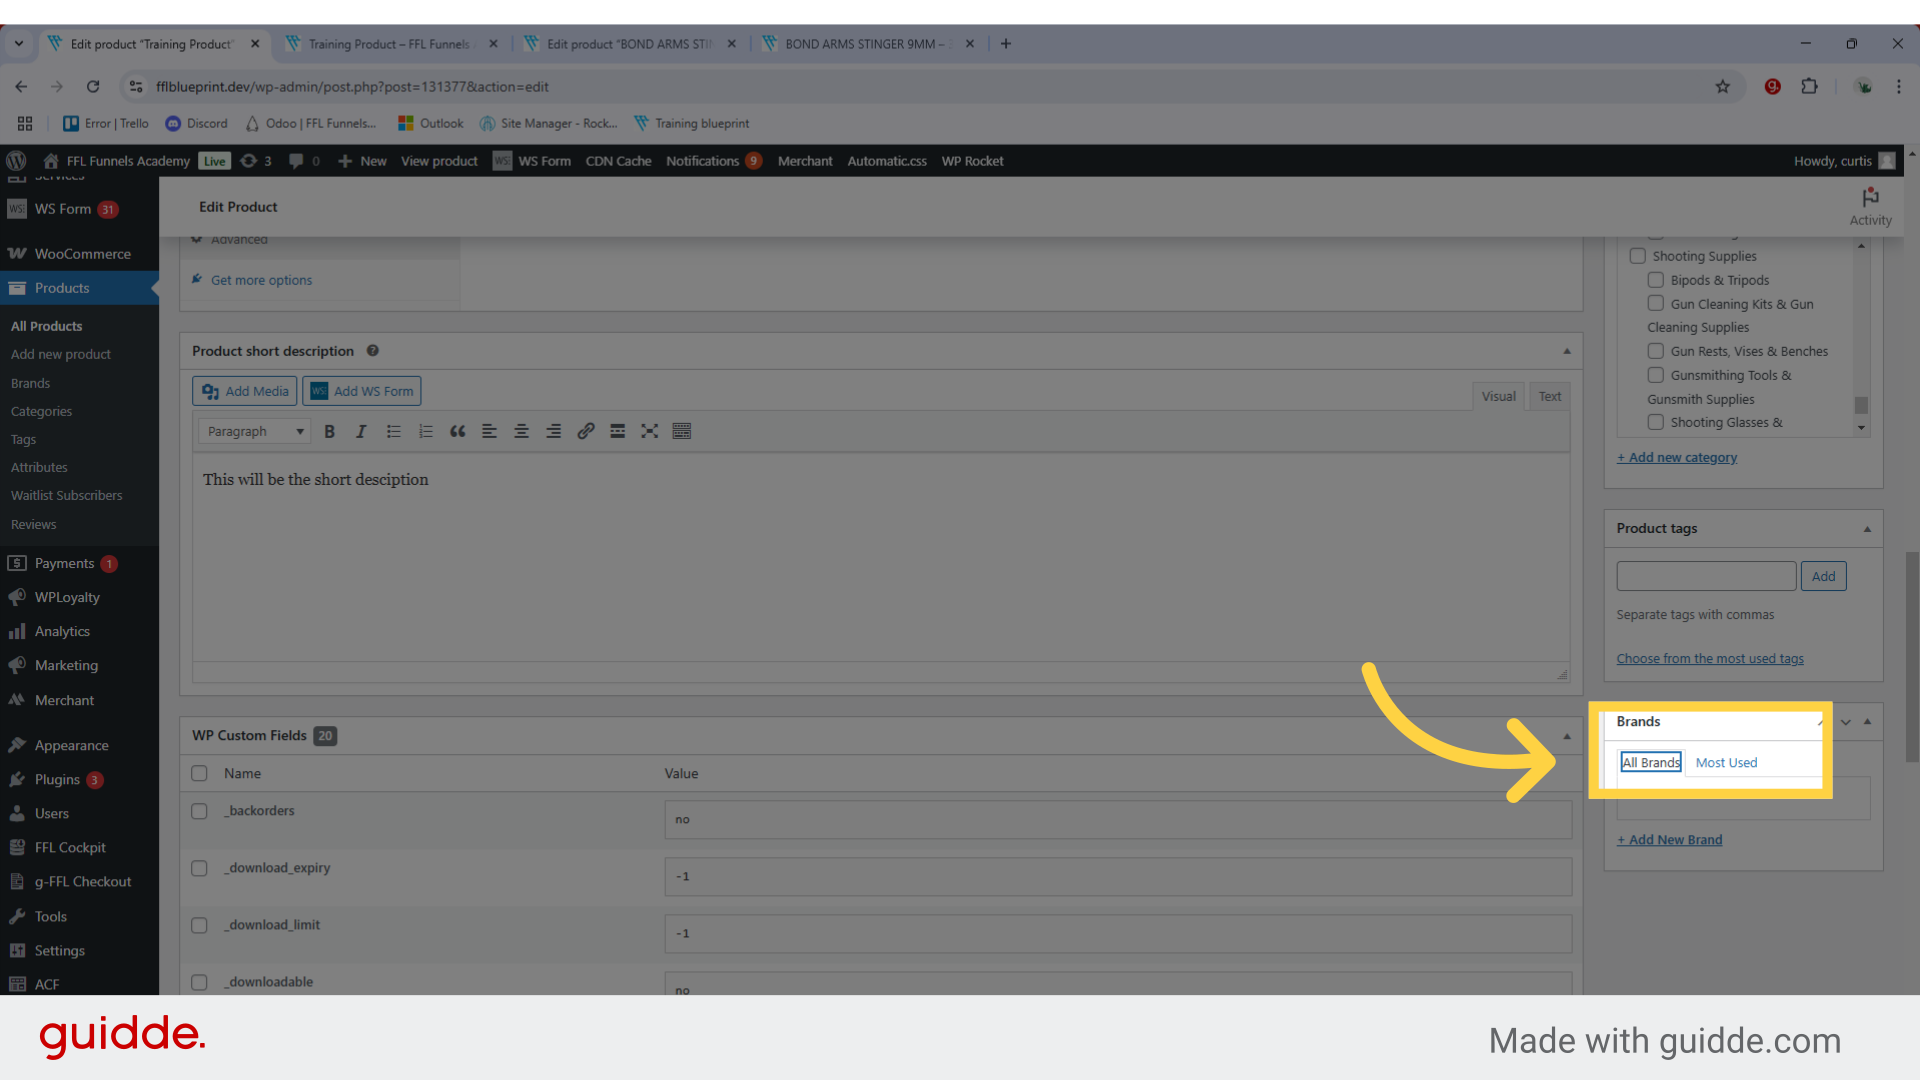
25. "Brands"
The Brands tab helps organize products by manufacturer. How to use: Select an existing brand (like "Glock" or "Smith & Wesson") Or add a new brand if needed. Why it's important: Groups all products from the same manufacturer. Helps customers find specific brands. Makes your store easier to navigate. Find under Products → Edit → Brands (right sidebar). Note: Like categories, brands are connected to FFL Cockpit - don't modify existing brand names.
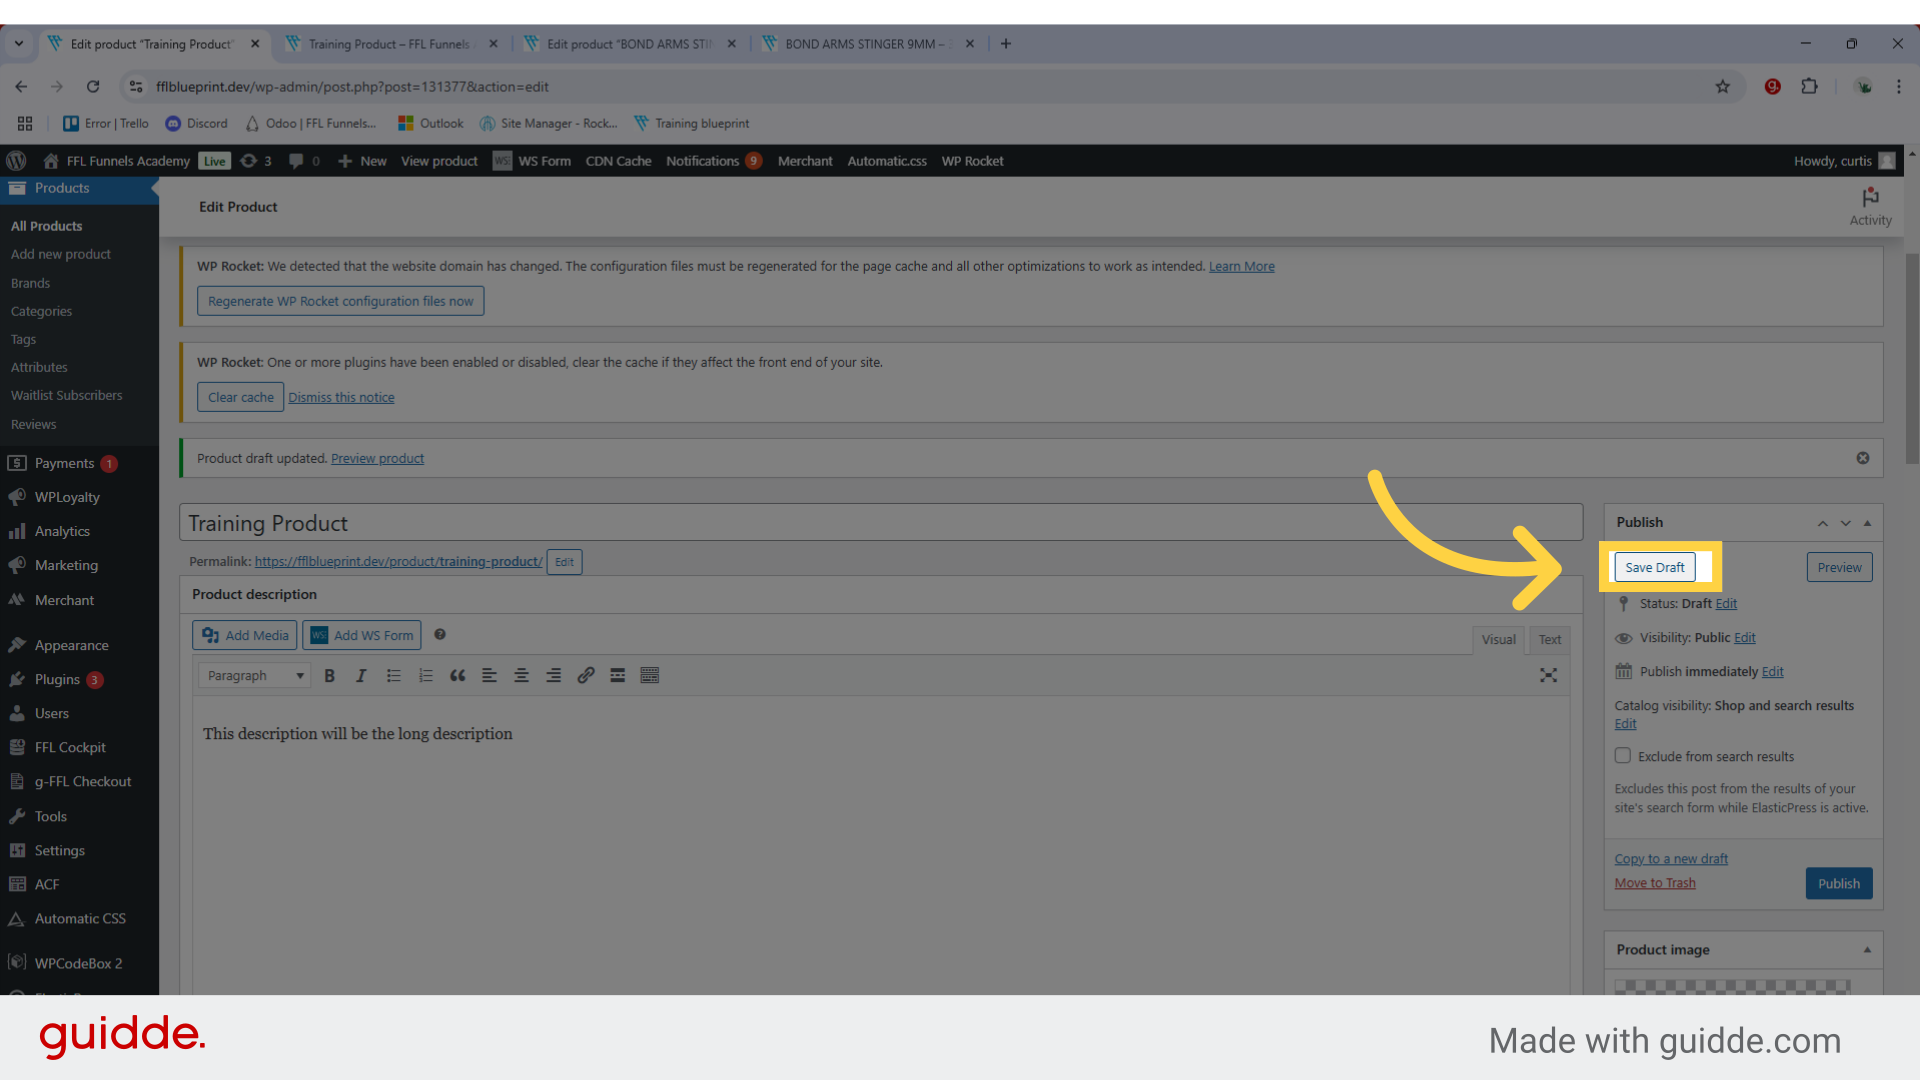
26. Click "Save Draft"
Click "Save Draft" in the right sidebar to store your product without publishing it. This lets you: Review the product details later. Make changes before going live. Ensure everything is correct.
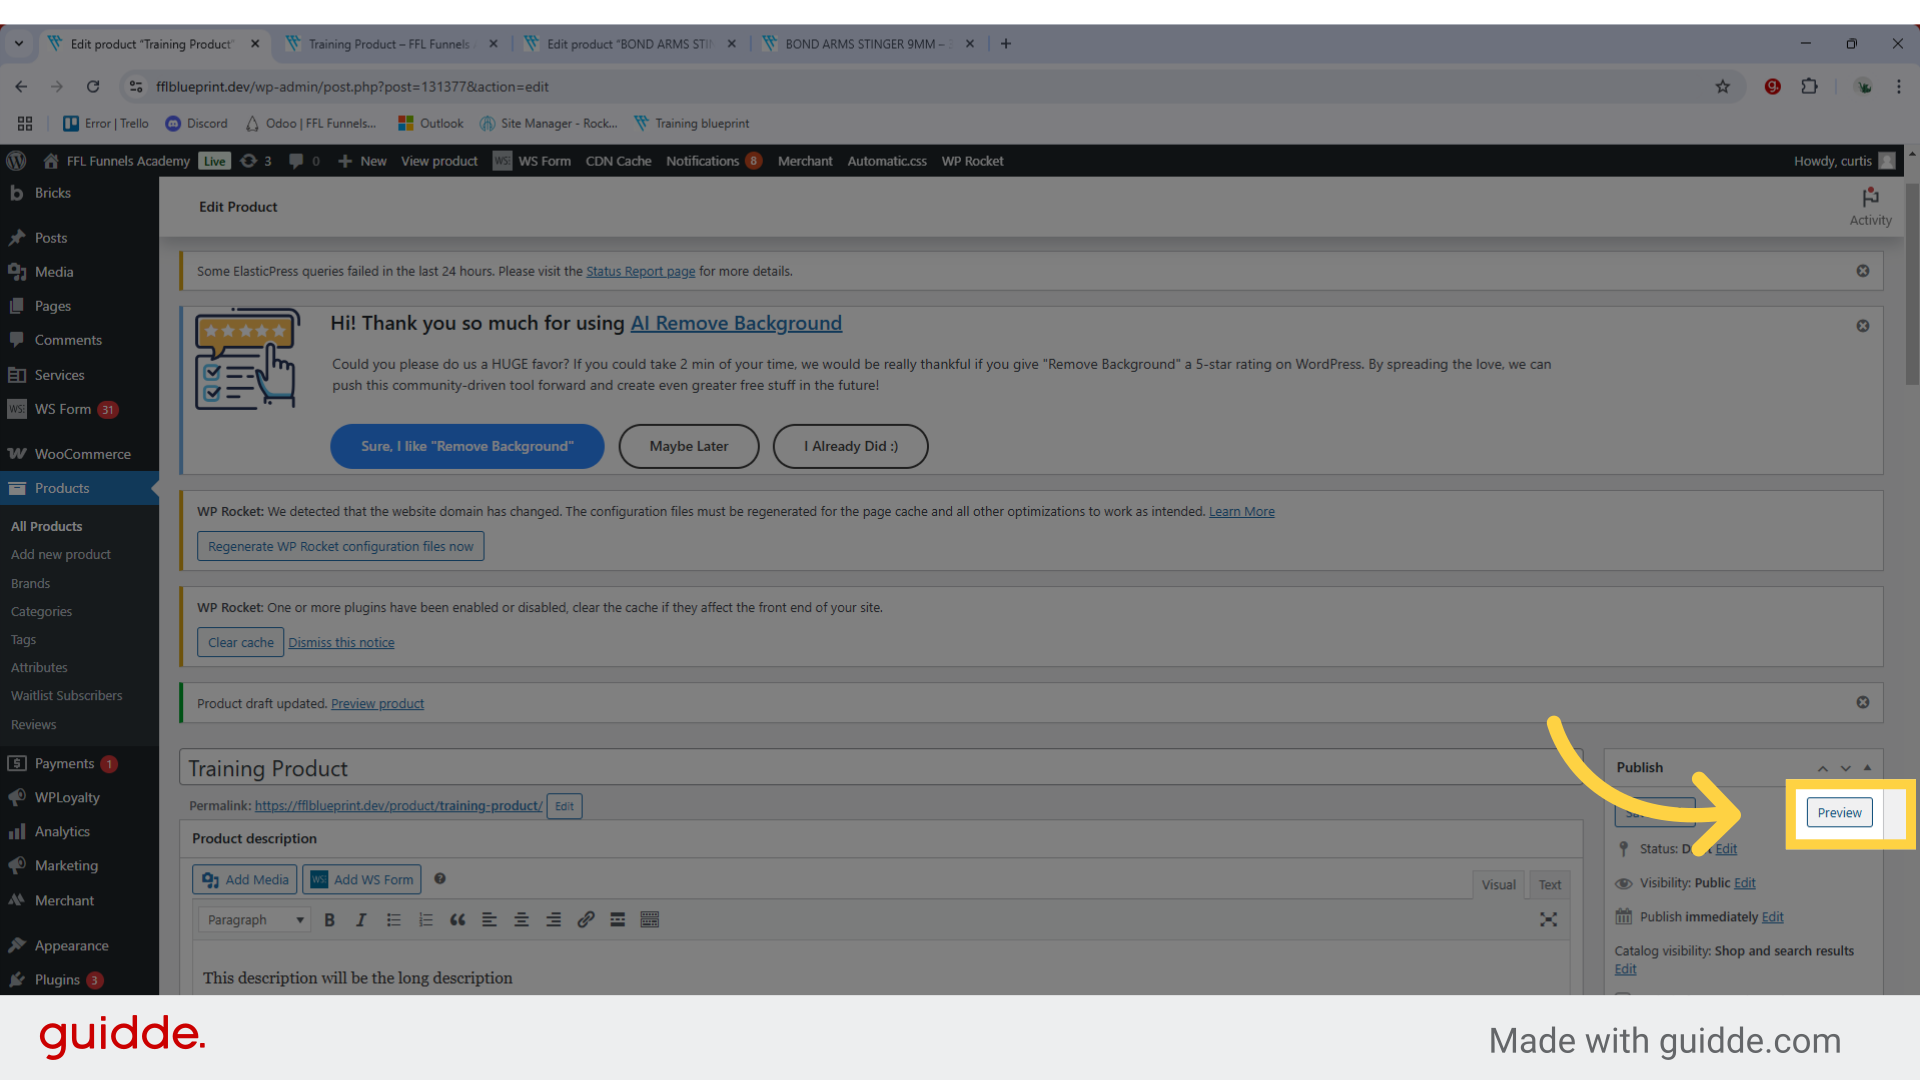
27. Preview the product
Ready to check your work? Click "Preview" (top right) to: See how your product looks to customers Check all details are correct View in a new tab without publishing Find the Preview button next to "Save Draft."
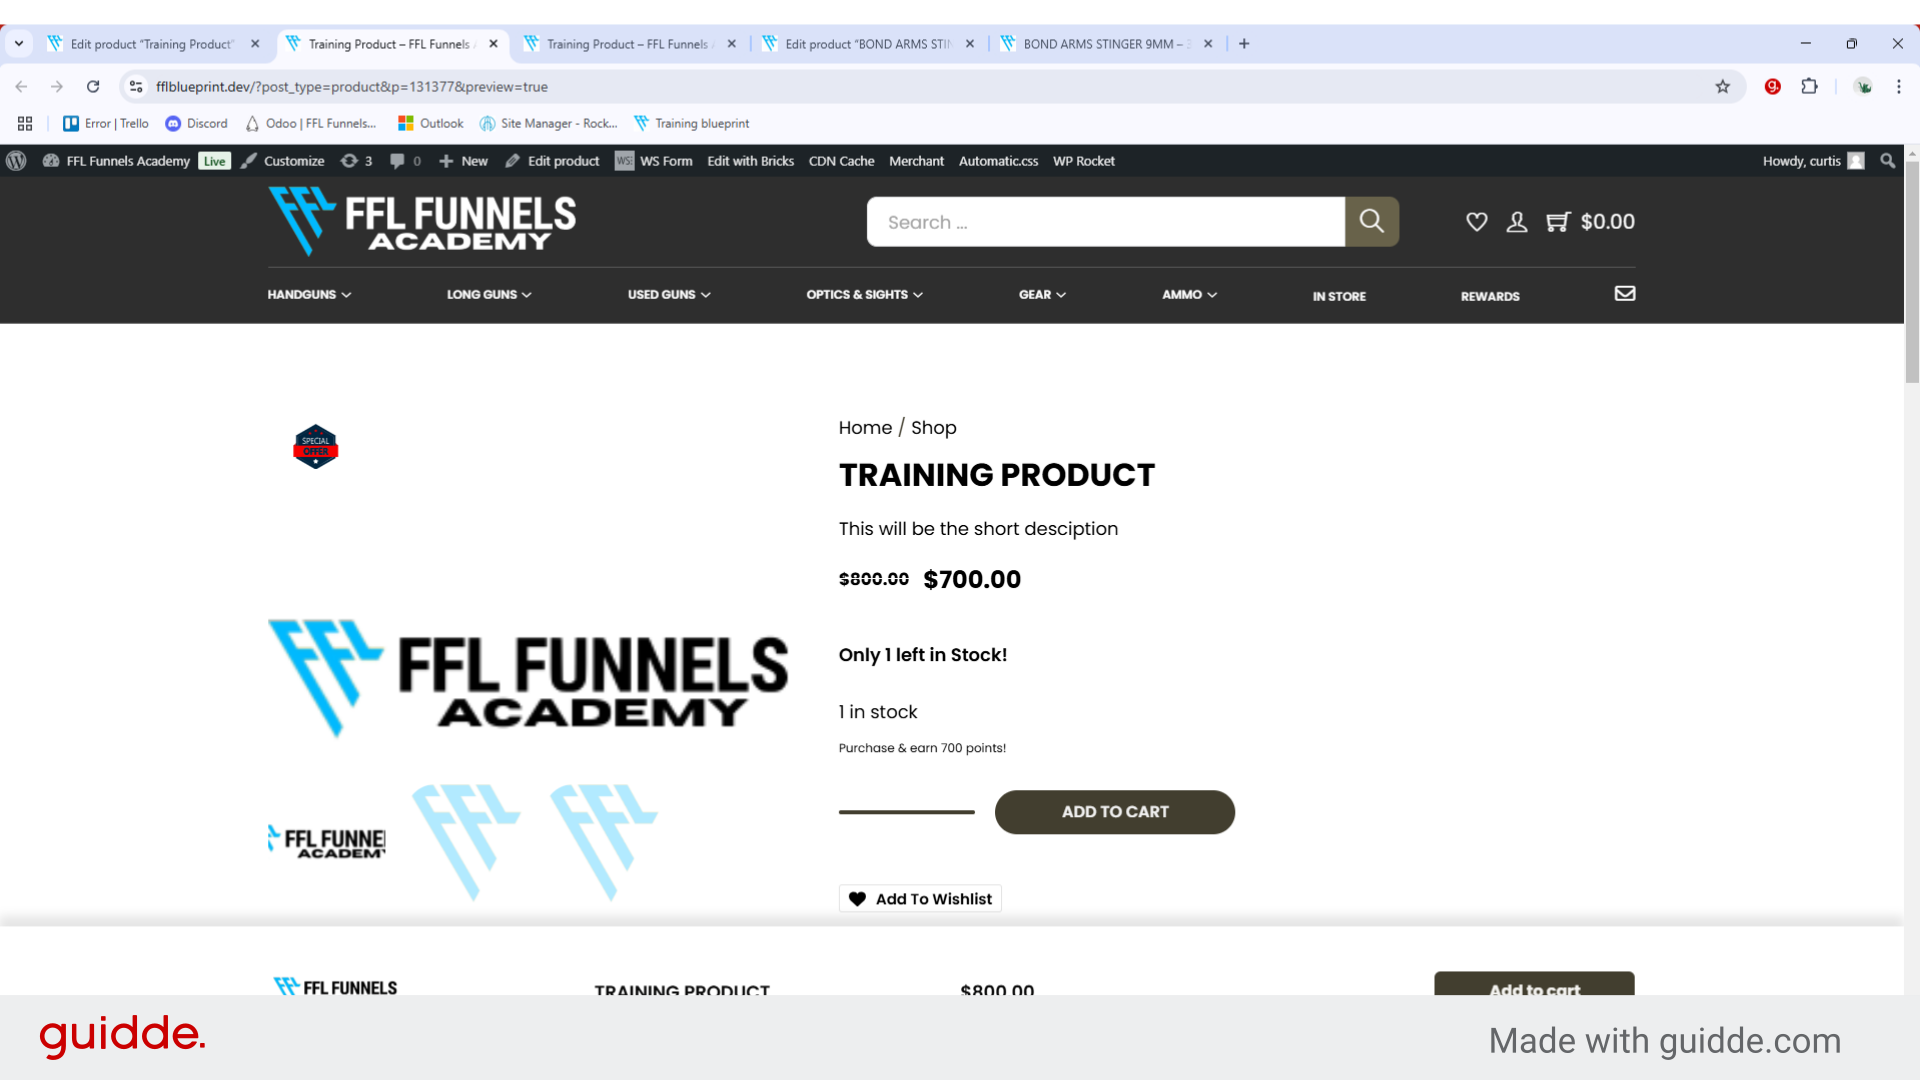
28. The Product Preview
Here you will see the preview of the product on your website.
29. Publish Section
The Publish section (top right) lets you control when and how your product appears: Status Draft: Not visible to customers. Published: Live on your store. Pending Review: Awaiting approval. Visibility Public: Visible to everyone. Private: Only visible to store admins. Password Protected: Access with password. Publish Options Publish immediately: Goes live right away. Schedule: Set a future publish date/time. Click "Publish" when ready to make your product live on your store.

30. Click "Publish"
Click "Publish" when ready to make your product live on your store.

This guide covered the detailed process of creating a product in WordPress WooCommerce, including adding product details, images, attributes, categories, brands, descriptions, and publishing the product. Simply follow the engaging instructions for a seamless product creation experience.
Was this article helpful?
That’s Great!
Thank you for your feedback
Sorry! We couldn't be helpful
Thank you for your feedback
Feedback sent
We appreciate your effort and will try to fix the article